Tuesday 30 June 2015

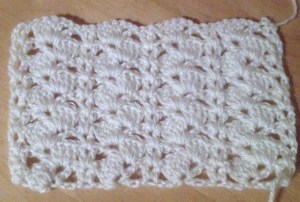
Shell stitch for summer top - 7

1908112_1598120873777981_6870802311796582207_n
Hi friends here I come with one more new stitch pattern in our summer top stitches series. This is a simple and easy pattern to make and can be used in many projects like summer tops, shawl,scarf, frock, skirt, baby blanket etc, according to your creativity.
Here is a step by step tutorial for this pattern
abbreviations:
Ch – chain
Sc – single crochet
dc – double crochet
Special stitch (4dc , ch1, 1dc) = shell
This pattern is multiples of 8 + 4 chs
11698642_1598120777111324_8005263572725460414_n
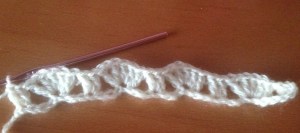
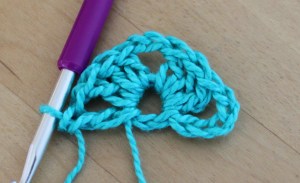
Row 1: dc into the 4th ch from the hook, skip 3 chs and shell into next st, skip 3 chs and 2 dc into next st and continue till the end of the row. Row ends with 2 dc.
11046256_1598120813777987_8329333279284961829_n
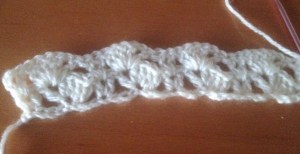
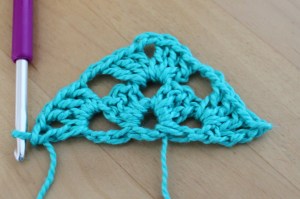
Row 2: ch3 1dc into the space between 2dc of the previous row, shell into the ch 1 space of the previous row shell, 2dc into the space between 2dc of the previous row and continue till the end of the row, 
10530721_1598120847111317_4114918958680130655_n
Repeat row 2 till you reach  the required measurement.
Hope you enjoyed the tutorial, any queries regarding the pattern feel free to mention in the comment box below.
Please like, comment and share.
Happy crocheting 


Sunday 21 June 2015

Granny Hexagon -2

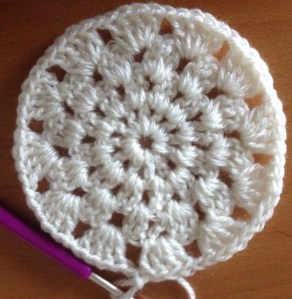
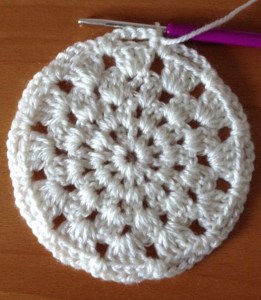
11351178_1594661667457235_5621010313118179712_n
Hi friends here i come with one more new tutorial. This tutorial is about one more variation in granny hexagon, very simple and easy to make, can be used in many projects like coasters, table mats, shawl, blanket, clothing, coin purse, handbag and many more.
Abbreviations
Ch - chain
Dc- double crochet
Sl st  - slip stitch
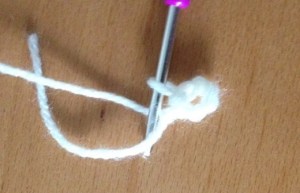
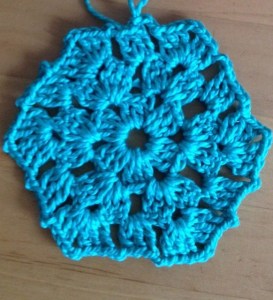
ch6 and sl st into the 1st ch to form a ring.
11535662_1594661484123920_5517766355685559302_n
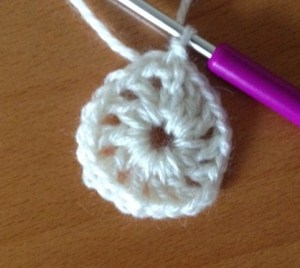
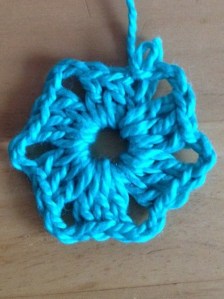
Round 1: ch4 (considered as 1dc+ ch1) 1dc into the loop and ch1. (make total 12dc and 12 ch1 including ch3+1 ) join the round with sl st into the 3rd ch of the beginning st.
16914_1594661514123917_2746256699060013997_n
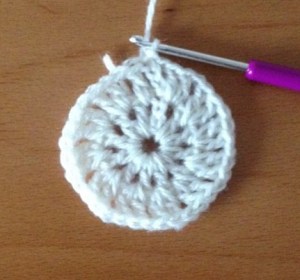
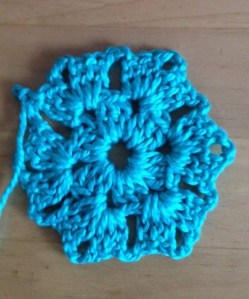
Round 2: ch3 turn the work 1dc into the same space. ch1 2dc or V stitch+ch1 in every ch1 space of previous round. ch1 and join the round with a sl st .
10361323_1594661534123915_7389602805279940856_n
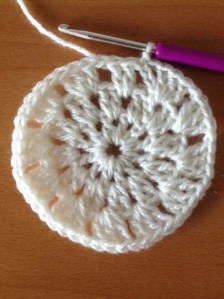
Round 3: ch3 turn the work and 2 dc into the ch1 space. ch1 3dc into the next ch1 space and continue till the end of the round. Join the round with a sl st.
10488159_1594661570790578_2453810845359528138_n
Round 4: ch3 turn the work and 3dc into the ch1 space . ch1 4dc into every ch1 space and continue till the end of the round. join the round with a sl st.
11535844_1594661634123905_9040674489268502623_n
Round 5: ch1 turn the work and sc into the ch1 space, ch4 2sc into the next ch1 space and contine till the end of the round. and join the round with a sl st into the ch1 of the beginning st.
11535860_1594661607457241_3091297278393888123_n
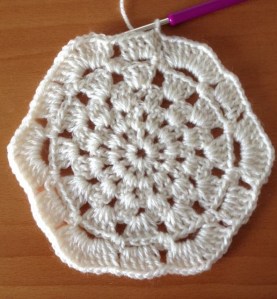
Round 6: ch3 turn the work and 4dc into the ch4 sp. ch1 5dc- ch1- 5dc into the next ch4 space, (5dc,ch1, 5dc-ch1-5dc, ch1, 5dc, ch1, 5dc-ch1-5dc ) so that you will have 6 corners. join the round with a sl st.
11351178_1594661667457235_5621010313118179712_n
Hope the tutorial was helpful. 
Please Like,comment and Share.

Happy Crocheting 


Granny top for all ages

IMG_0018
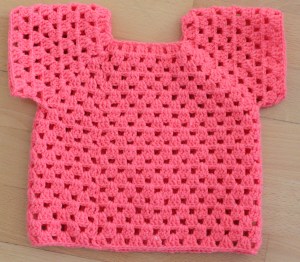
Hi friends today i am here with one more new and exciting tutorial. This is a very simple and easy top to make for all ages. This can be done even by the beginners too. Here in the tutorial i have made a top for my 2 yr old daughter. I have used 3.5mm crochet hook, you can use any yarn and any hook size of your choice.
As i mentioned  this pattern is for all ages. Here i am not going to teach you by number counts but by measurements. Hope you will enjoy this pattern.
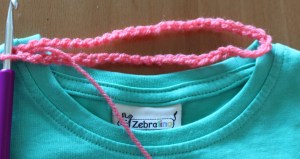
Take a tee- shirt for neck measurement
IMG_0450
This pattern is multiples of 3 stitches so when you are making a base ch you need to make multiples of 3 and should divide by 4
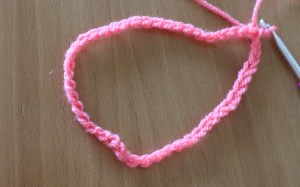
for example in the demo piece i have done 60 ch it is a multiple of 3 and if we divide by 4 we get 15 equal stitches. As our pattern has 4 corners. make a slip stitch into the 1st ch and form a ring.
IMG_0451
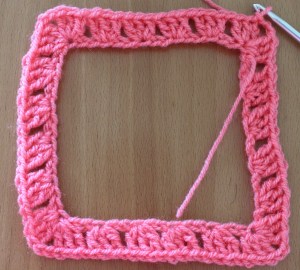
Row 1 : ch3 and 2 dc into the same st, ch 1 skip 2 ch and 3dc into the next st. (in the demo pattern i will consider the 15th st as 1st corner st) . work pattern till 15 th ch. into the 15th ch 3dc ch2 3dc. skip 2 ch  and 3dc into the next ch. leaving the 1st 3dc count the 3dc set or shell till the first corner. every side we should make the same no. of shells.and into the 1st st of the row work 3dc, ch2 and join with a slip st into the 3rd ch of the beginning st.
IMG_0453
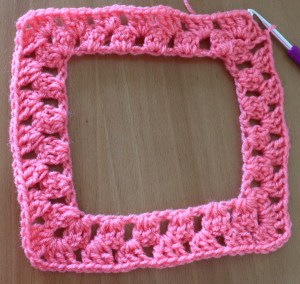
Row 2: ch3 turn the work and 2dc into the same ch1 space, ch1 3dc into the next ch1 space till the corner ,into the corner ch2 space work 3dc-ch2-3dc., till the row ends and join with a sl st.
IMG_0454
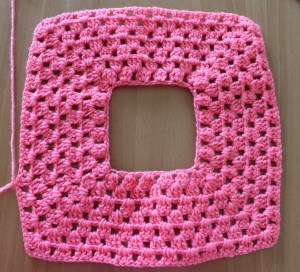
Repeat row 2 till you reach the required measurement. For the demo piece i have done 7 rows. (make as many rows as required to  fit your shoulder measurement and chest measurement) 
IMG_0011
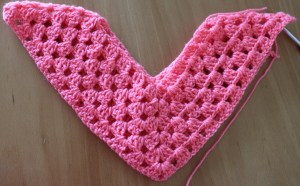
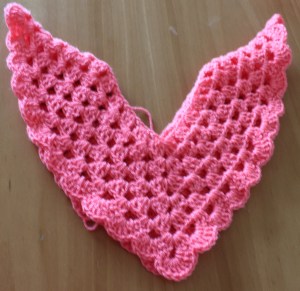
this is how it looks when you fold it into half.
IMG_0012
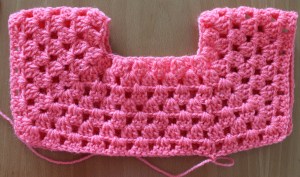
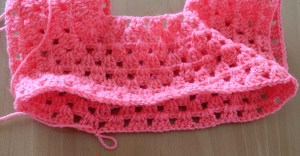
Now we should continue making the body part. make one more row and join the edges as shown in the picture below.
IMG_0014
make as many rows as required to reach the desired measurement. Here i have made 14 rows.
IMG_0016
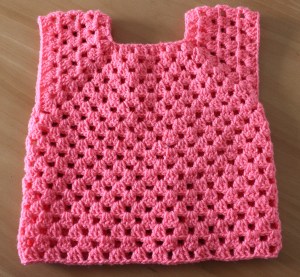
If you want a sleaveless top then you can stop here by fastening off. Or you can join the sleeves by adding a new yarn. I have made 3 rows for sleeves.
IMG_0018
Hope the tutorial was helpful. If you have any doubts pls mention in the comment box below. Please like, comment and share .
Happy Crocheting


Friday 19 June 2015

Granny Hexagon

10352757_1593934600863275_2972381743277310735_n
Hi friends here i come with a new tutorial today. As we all know granny square, granny rows, and granny triangle, we have 1 more pattern called granny hexagon. This is also a very simple pattern like other granny pattern, and you can use this motif in many projects like doily, table mat, coin purse handbag, bolero and many more. This is one of the best pattern for the beginners.
Abbreviations
Ch - chain
Dc- double crochet
Sl st  - slip stitch
ch6 and sl st into the 1st ch to form a ring.
round 1: As we know it is a hexagon pattern we need to have 6 corners so ch3 2dc into the same loop, ch2 3dc, continue till we have 6 dc clusters , ch2 and join the round with a sl st into the 3rd ch of the beginning st.
11536720_1593934510863284_1262174405590116045_n
Round 2: ch3, 2dc, ch2 3dc into the same space and into every space (just skip ch3 instead make 1dc) till the end and join with a sl st.
10169359_1593934587529943_5846388812590320131_n
Round 3: ch3 2dc into the same space, ch2 , 3dc ch2 3dc into the corner space and continue till the end of the row and join with a slip st.
10352757_1593934600863275_2972381743277310735_n
If you want to make more rounds repeat round 3 till you reach the required measurement. or fasten off.
Hope the tutorial was helpful.Please share your views in the comment box. Like,comment and share if you like the tutorial.
Happy Crocheting

Thursday 18 June 2015

Granny Triangle

11402698_1593148734275195_5235160733392830244_n
Hi everyone here i come with a new tutorial. It is a pattern of granny triangle. Very simple and easy to make and can be used in many projects like blanket, scarf, even u can just use these motifs as coasters too.
Abbreviations
Ch – chain
Dc- double crochet
Sl st  – slip stitch
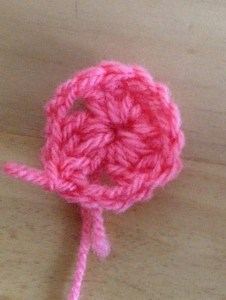
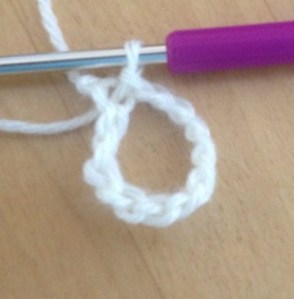
ch5 and join with slip st into the 1st ch to form a ring 
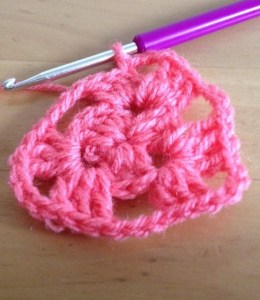
Round1 : ch3, 2 dc into the loop, ch3 and 3 dc into the loop , ch3, 3 dc ch3 and join the round with a slip st into the 3rd ch of the beginning st.
11140117_1593148664275202_1381503908735001148_n
Round 2 : ch3, 2dc ch2 3dc into the space, ch2 3dc ch2 3dc into next 2 ch3 spaces. ch3 and join the round with a sl st into the 3rd ch of the beginning st.
11401359_1593148677608534_7902766588761764468_n
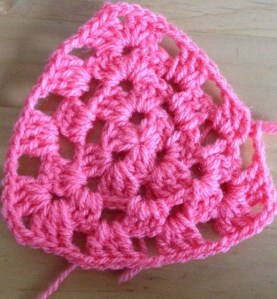
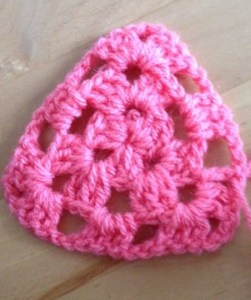
Round 3: ch3 2dc ch2 3dc into the same space, ch2 3dc into the next sp and continue till the end of the round, and join with a sl st.
10614302_1593148704275198_5496079737226418373_n
round 4: repeat round 3
hope the tutorial was helpful.
Happy Crocheting.


Wednesday 17 June 2015

Motif - 1

11148731_1590110154579053_39356049632296127_n
Hi friends, today i am here with one more new and exiting project. Simple to make and looks great. This motif can be used in any of your projects like tops,skirts, bolero, shawl, scarf etc. It gives a designer look for all the project made using these kind of motifs. I love making these kind of motifs than the regular stitch patterns. This motif design was provided to me by Marifu6a that is her blog name. I am sorry i dont know her name exactly but anyways thanks for the lady to provide me with such wonderful motif pattern. She had mailed me only the diagram of the motif. But today i am taking this opportunity to teach you all how to crochet this motif. Hope you all enjoy the tutorial.
Abbreviations
Ch - chain
Dc- double crochet
Sl st  - slip stitch
ch 12 and sl st into the 1st ch and form a ring
11391758_1590110101245725_2538938412250658840_n
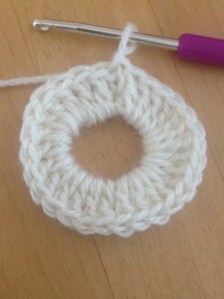
Round 1: ch3 and 27 dc into the loop and join with a sl st into the 3rd ch of the beginning st.
11234045_1590110111245724_4298424671812690206_n
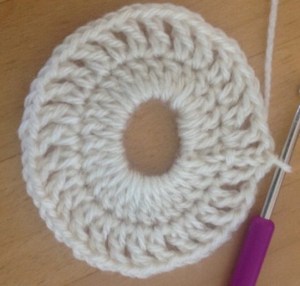
Round 2 : ch4 1dc and ch 1 into every st, join the round with a sl st
11167953_1590110144579054_253043957254372265_n
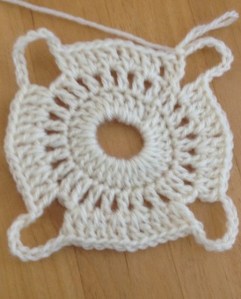
Round 3 : ch3, 1dc into the same space, 2dc into next 2 ch1 space, ch1 2dc into next 3 ch1 space ch9 skip 1 ch1 space and 2dc into the next ch1 space continue till the end of the round. and join with a slip st.
11148731_1590110154579053_39356049632296127_n
How to join motifs together:
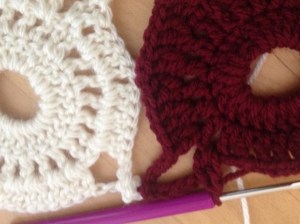
for 2nd motif make till 2nd round  and in 3rd round join near the ch1 sp and in ch9 join in 5th ch as shown in the picture below
11391771_1590110184579050_4903250584902791351_n
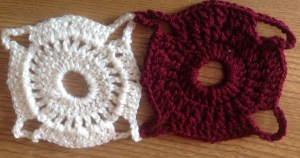
Here i have made both motifs in different color so that you can see the joining.
11392991_1590110211245714_334989007080137372_n
I would also like to share 1 sample project i made few months back for my daughter using this pattern
11402683_1590110251245710_5043701020582042839_n
Hope the tutorial was useful and was understandable. If you have any doubts regarding this pattern please feel free to ask me in the comment box. I wish you enjoy the tutorial. Please like, comment and share.
happy crocheting

Granny square motif -1

IMG_0006
Hi friends today i am here with a wonderful granny square motif tutorial, I am sure most of you know how to make a full granny square, but very few know how to make a half granny square. So here i take an opportunity to teach you all how to make both full and half granny square. These motifs can be used in many projects like, blanket, bolero, scarf, poncho, tops, skirts and many more, the list doesn't end when it comes to granny square. One of the easy, good looking and popular crochet pattern which i have come across. So lets not dely any more and start the tutorial. Abbreviations : ch : chain Dc: double crochet sl st : slip stitch ch5 , sl st into the 1st ch to form a ring

IMG_0001 IMG_0003
Round 1: ch3, 2dc into the loop ch2 3dc,ch2,3dc,ch2 3dc,ch2 sl st into the 3rd ch of the beginning st to join the round

IMG_0004
Round 2: ch3 turn the work and 2dc into the same space ch2 3dc into the same space , ch2 3dc-ch2-3dc into the next 3 ch2 spaces. ch2 and join the round with sl st. IMG_0005
repeat round 2 till the required measurement
Half Granny Square: make ch5 sl st into the 1st ch and form a ring round 1: ch5 3dc into the loop ch3 3dc ch1 1dc into the loop
IMG_0007
Round 2 : ch5  3 dc intp the same space ch2 3dc- ch2 -3dc into the next ch2 space, ch2 3dc into the next ch2 space, ch1 1dc into the same space.
 IMG_0008
Repeat round 2 till you reach the required measurement Hope the tutorial was useful. Please share your views in the comment box. LIke, comment and share Happy crocheting .
Friday 5 June 2015

Simple and easy poncho for all ages

IMG_0460
Hi everyone, here i come with a new project today that is a poncho pattern for all ages. This pattern is very simple and easy to make, even beginners can make. One of my viewer had Requested me to make a poncho pattern so here it is.
As i mentioned earlier this pattern is for all ages. Here i am not going to teach you by number counts but by measurements. Hope you will enjoy this pattern.
Take a tee- shirt for neck measurement
IMG_0450 
This pattern is multiples of 3 stitches so when you are making a base ch you need to make multiples of 3 and should divide by 4 
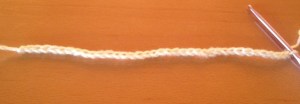
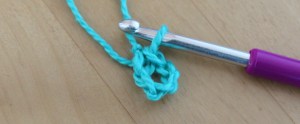
for example in the demo piece i have done 60 ch it is a multiple of 3 and if we divide by 4 we get 15 equal stitches. As our pattern has 4 corners. make a slip stitch into the 1st ch and form a ring.
IMG_0451
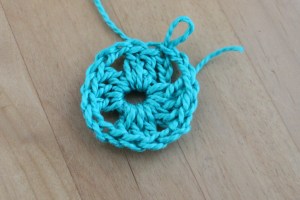
Row 1 : ch3 and 2 dc into the same st, ch 1 skip 2 ch and 3dc into the next st. (in the demo pattern i will consider the 15th st as 1st corner st) . work pattern till 15 th ch. into the 15th ch 3dc ch2 3dc. skip 2 ch  and 3dc into the next ch. leaving the 1st 3dc count the 3dc set or shell till the first corner. every side we should make the same no. of shells.and into the 1st st of the row work 3dc, ch2 and join with a slip st into the 3rd ch of the beginning st.
IMG_0453
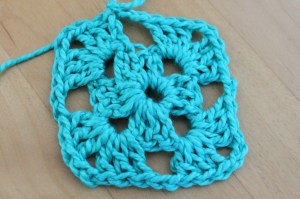
Row 2: ch3 turn the work and 2dc into the same ch1 space, ch1 3dc into the next ch1 space till the corner ,into the corner ch2 space work 3dc-ch2-3dc., till the row ends and join with a sl st.
IMG_0454
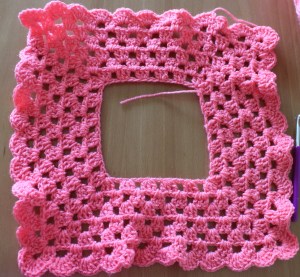
Repeat row 2 till you reach the required measurement. For the demo piece i have done 6 rows.

IMG_0455
Edging: ch3 4dc into the same space, sc into the 2nd st of the previous row shell, 5dc into the next ch1 space, in the corners work 9dc, work till the end of the row and join with a sl st.
IMG_0456
IMG_0458
If you want you can fasten off and stop at this point or else you can even add collar to it .
I have added collar to the demo piece.
join the yarn and ch3 work 1 dc into every st till the end and turn the work.
work 1 or more rows of dc 
IMG_0460
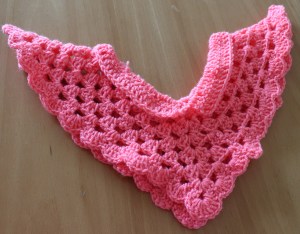
this is how it looks after making collar.
Hope the tutorial was useful. Please feel free to share your views in the comment box or if you are looking for any particular pattern you can mention. i will try my best to help you out.
Please like, comment and share
Happy crocheting