Friday, 3 July 2015

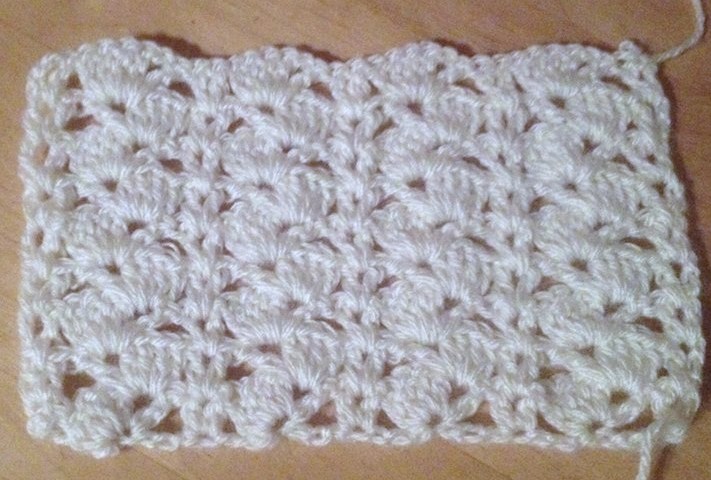
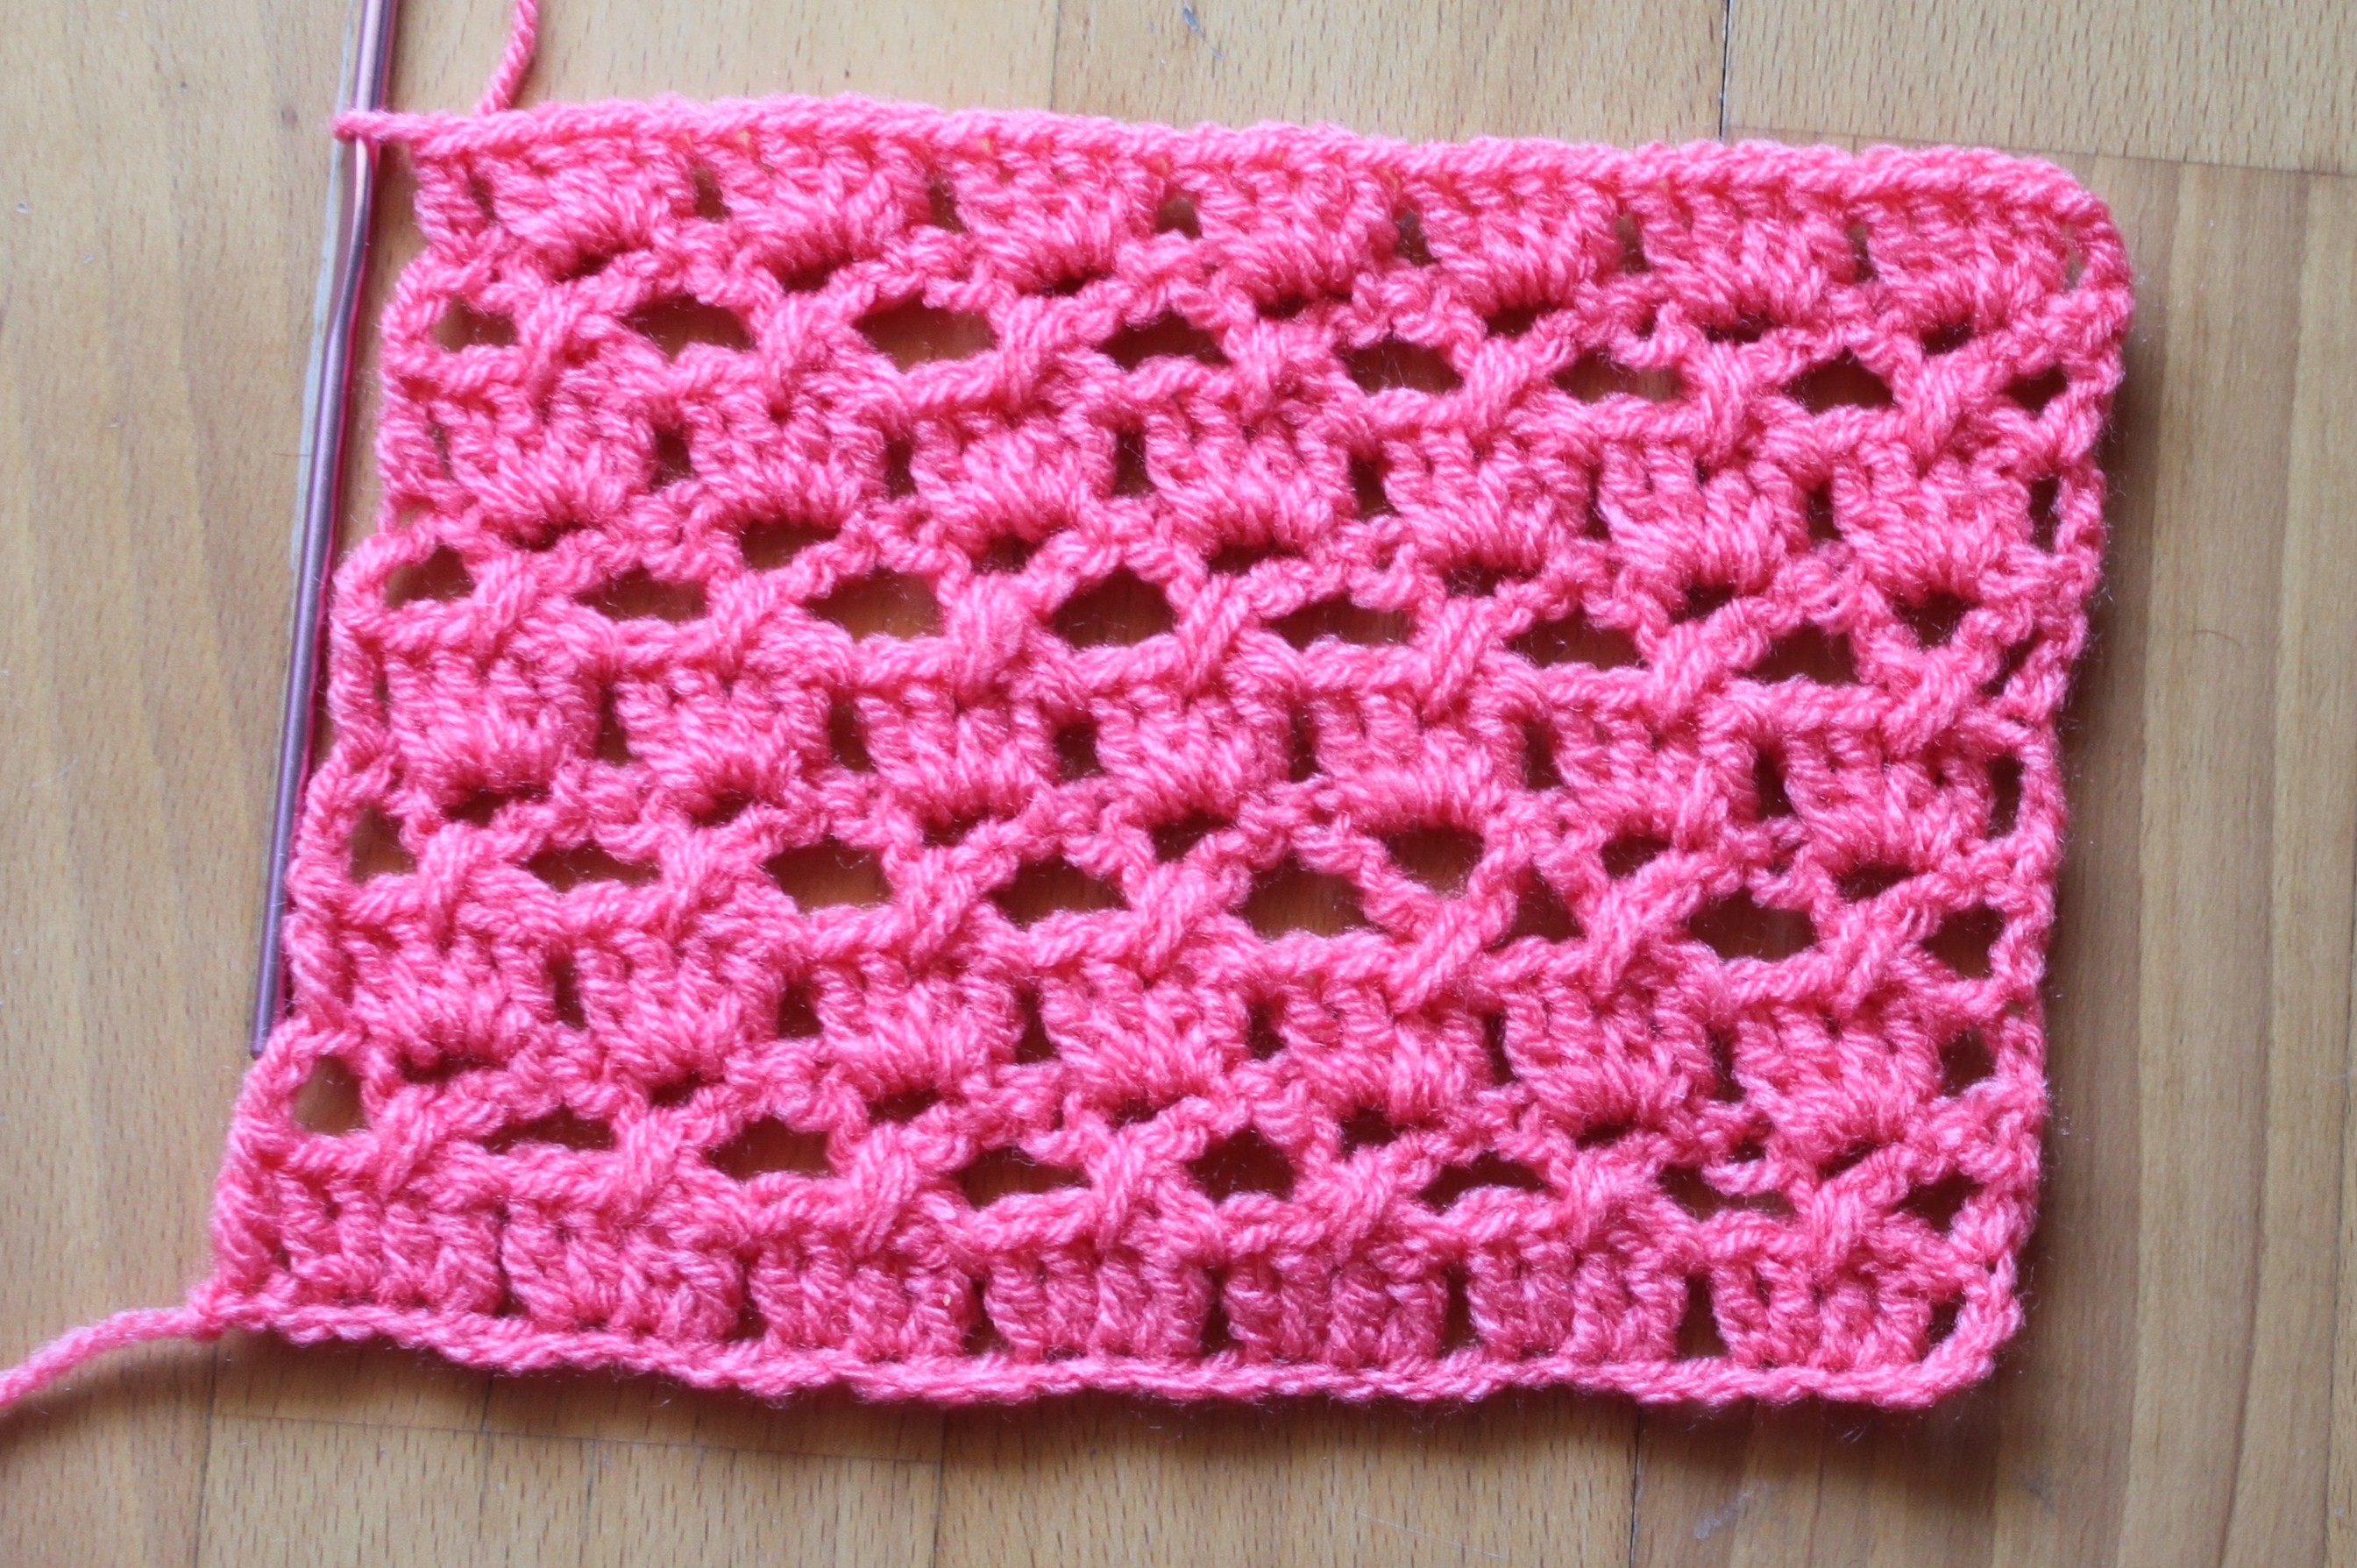
Shell stitch for summer top- 8

IMG_0041
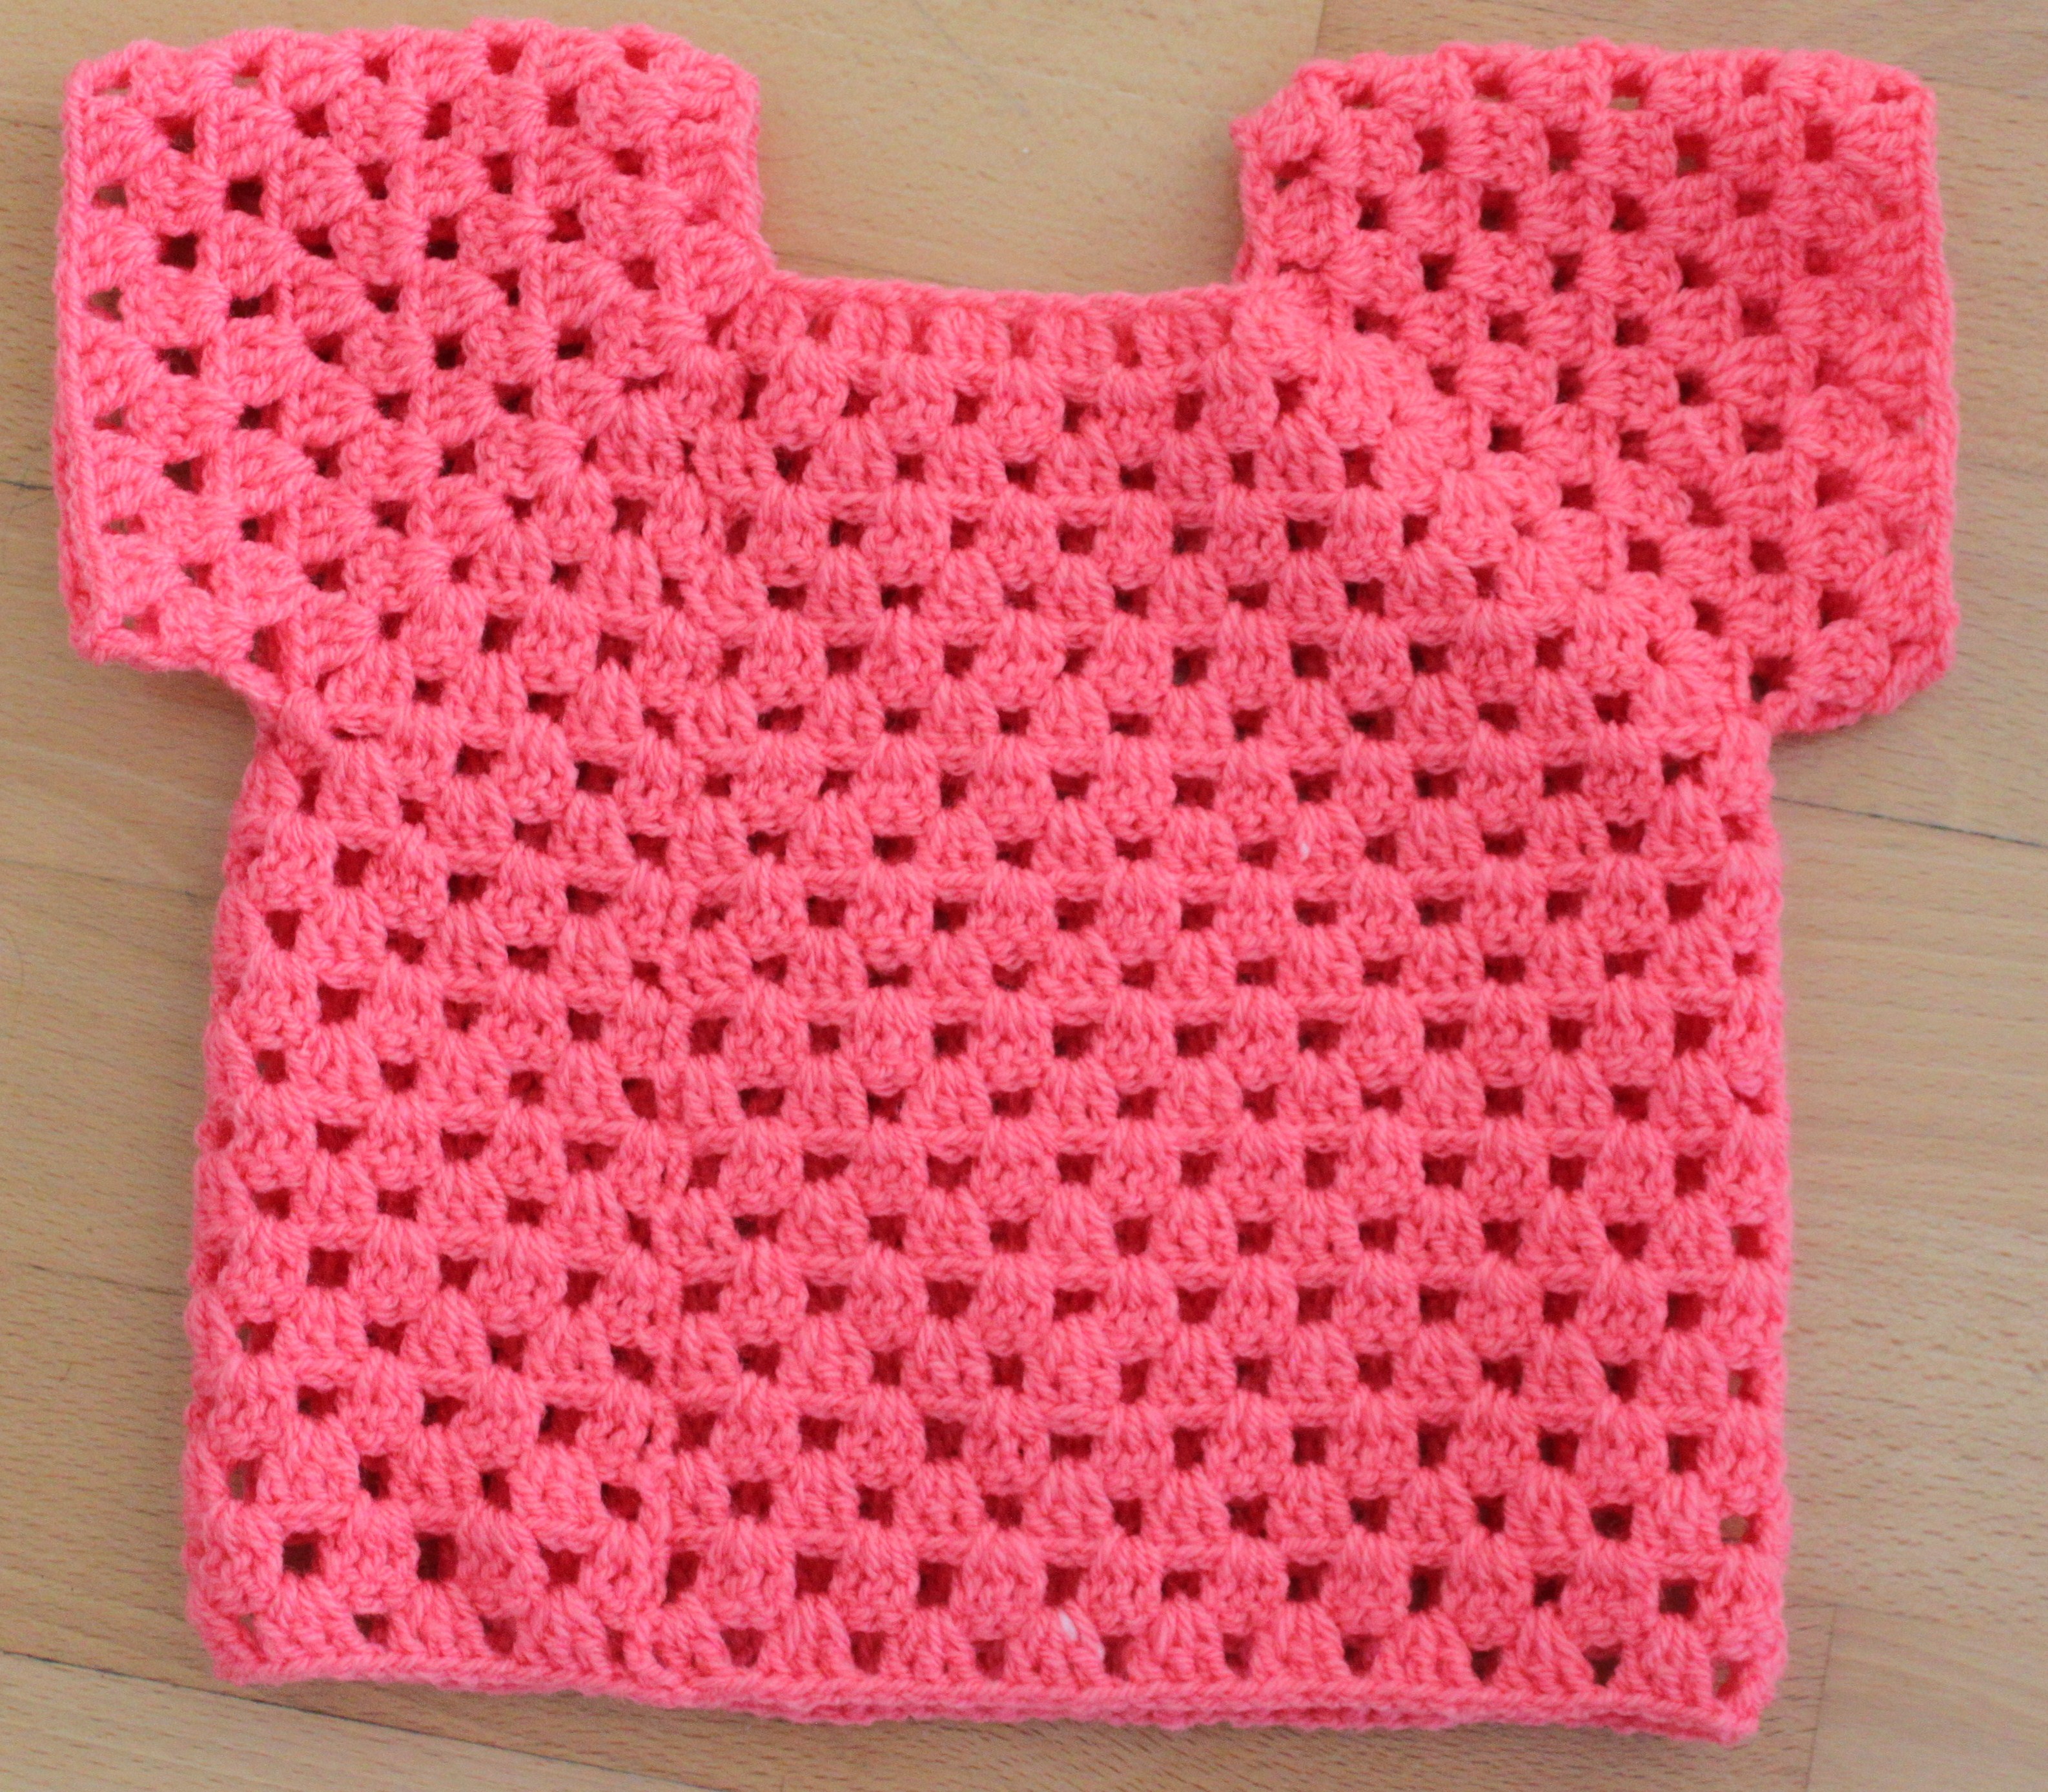
Hello friends here is one more new pattern for our summer top series. As usual this is also very simple and easy to make pattern. I am sure you are going to like this pattern. This pattern can be used in any of your project as it fits all the project really well.
Here is a step by step tutorial of this pattern
abbreviations:
Ch – chain
dc – double crochet
Tr - treble crochet

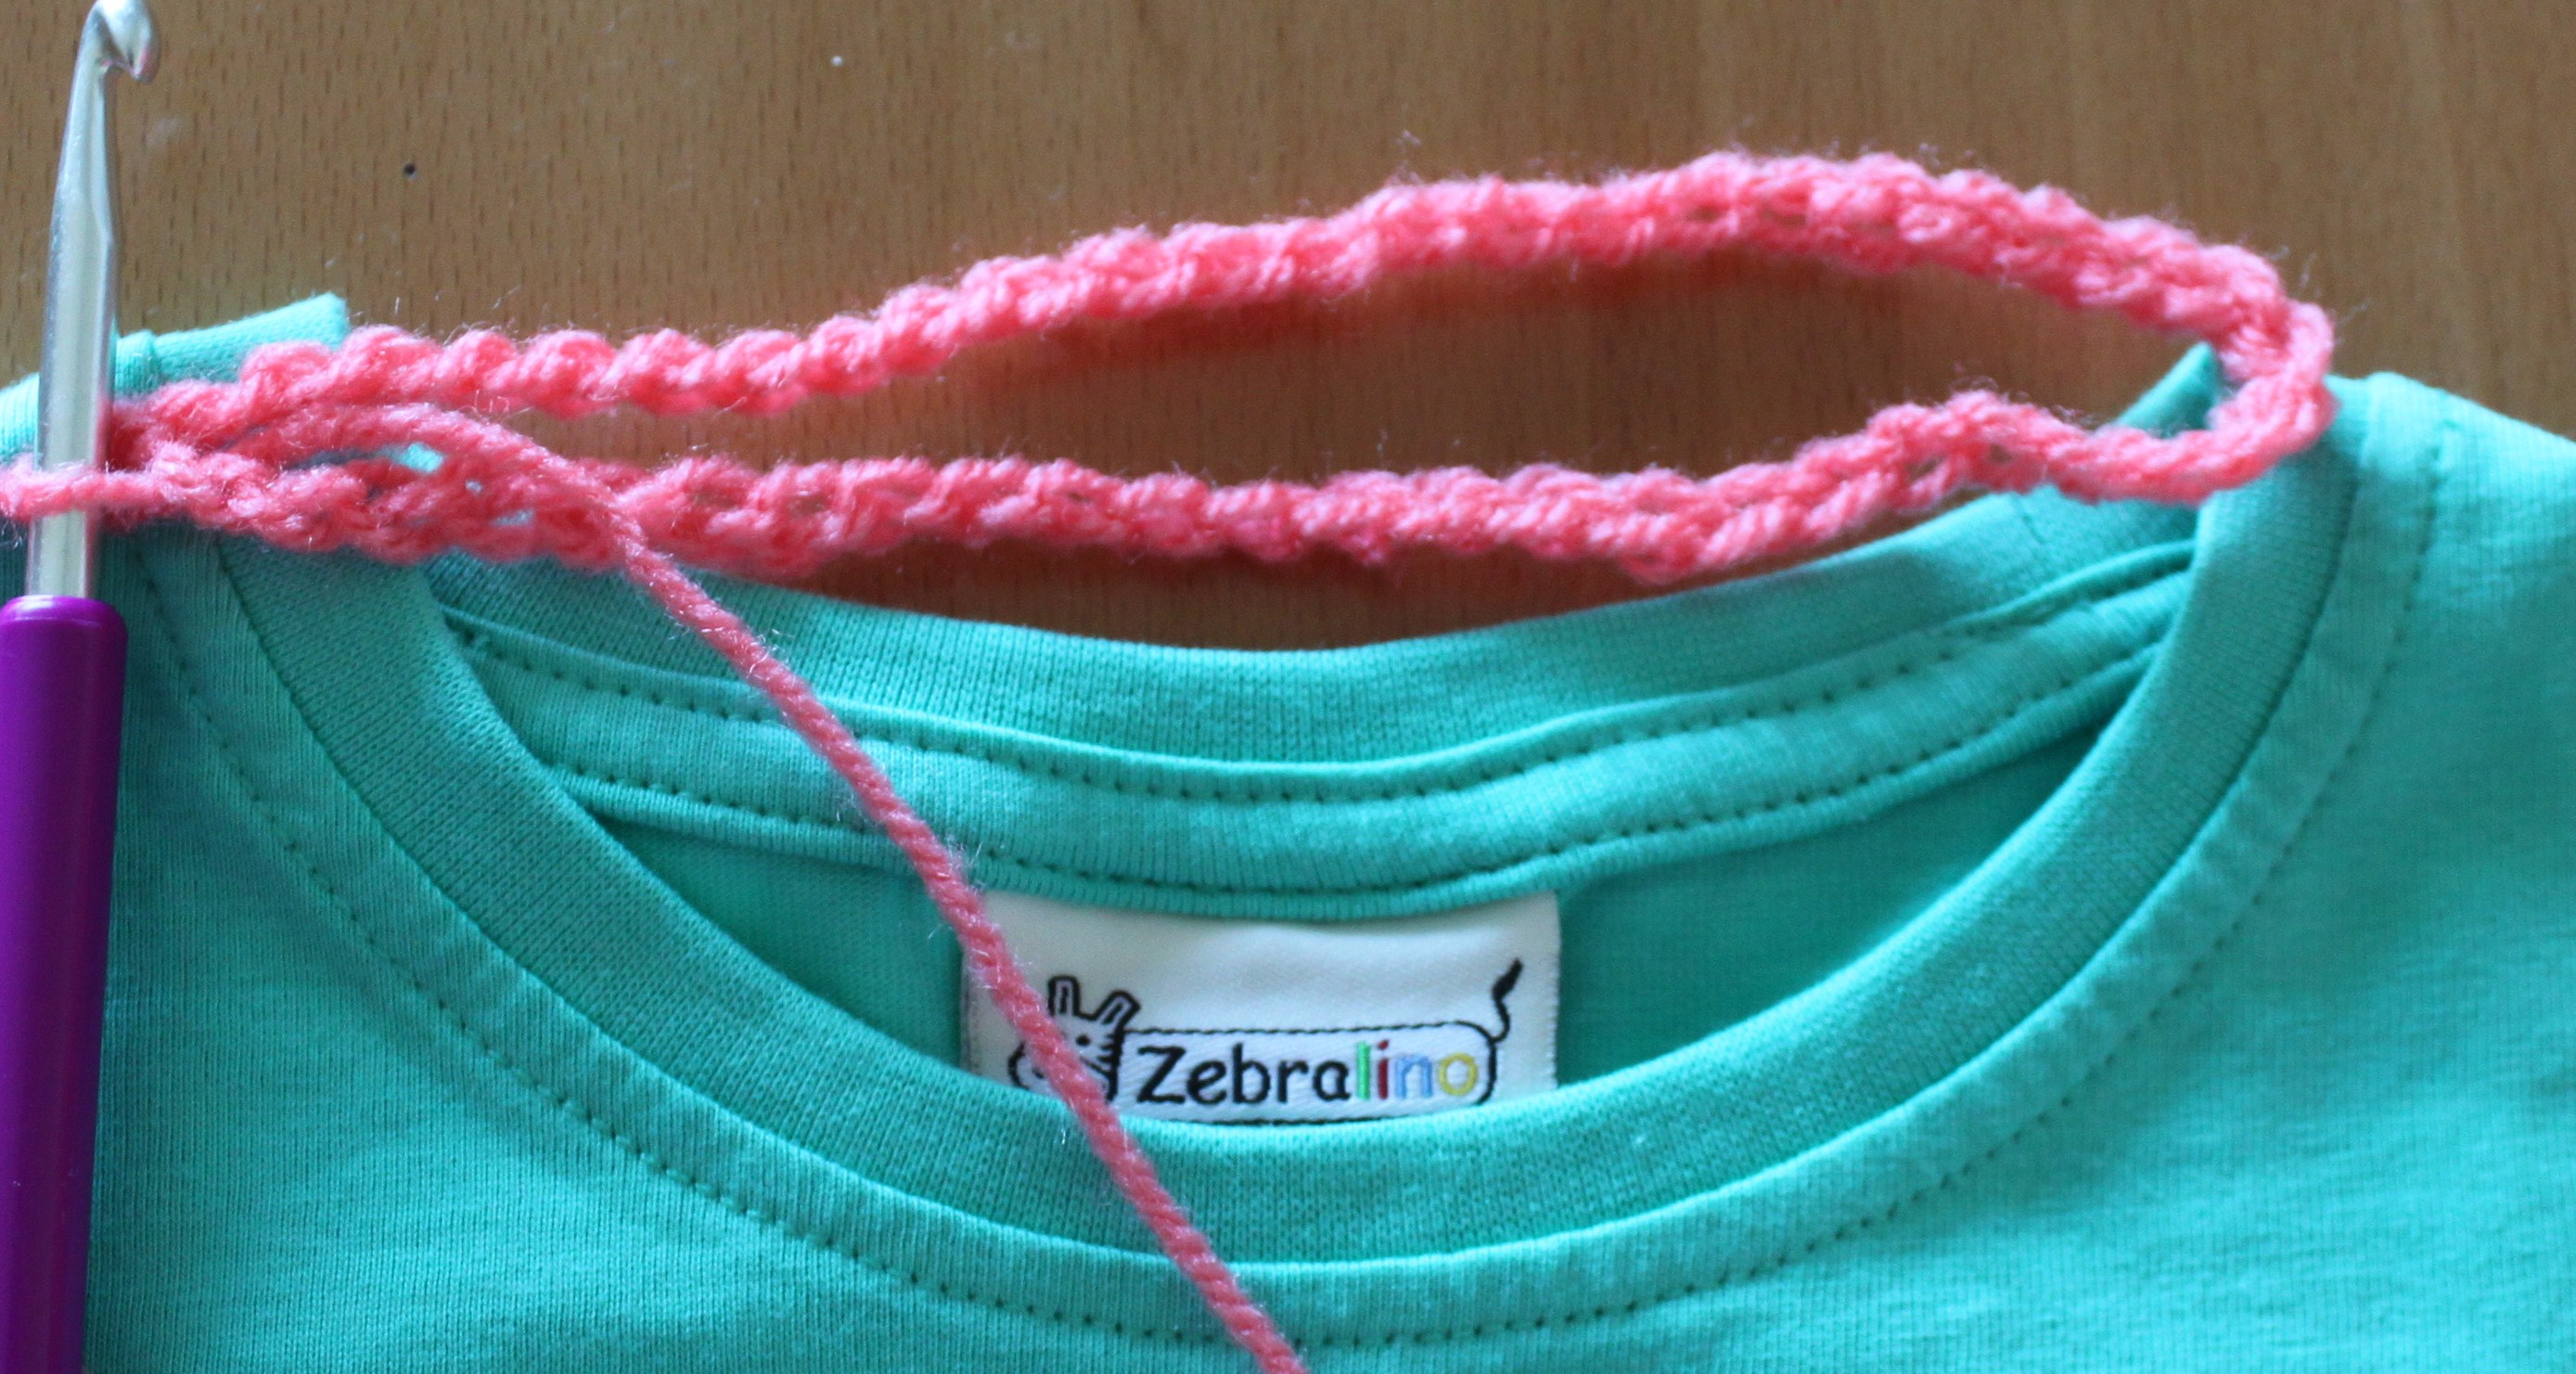
This pattern is multiples of 4+ 8chs

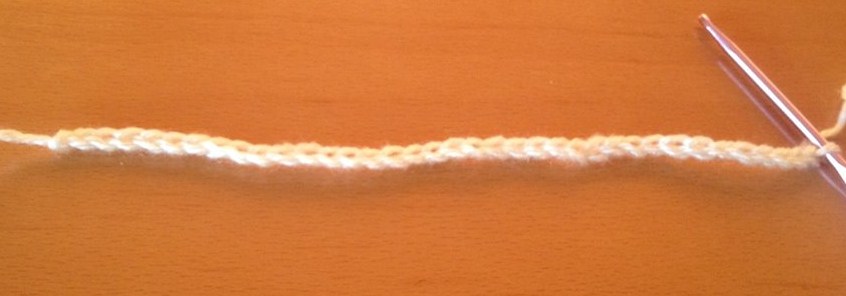
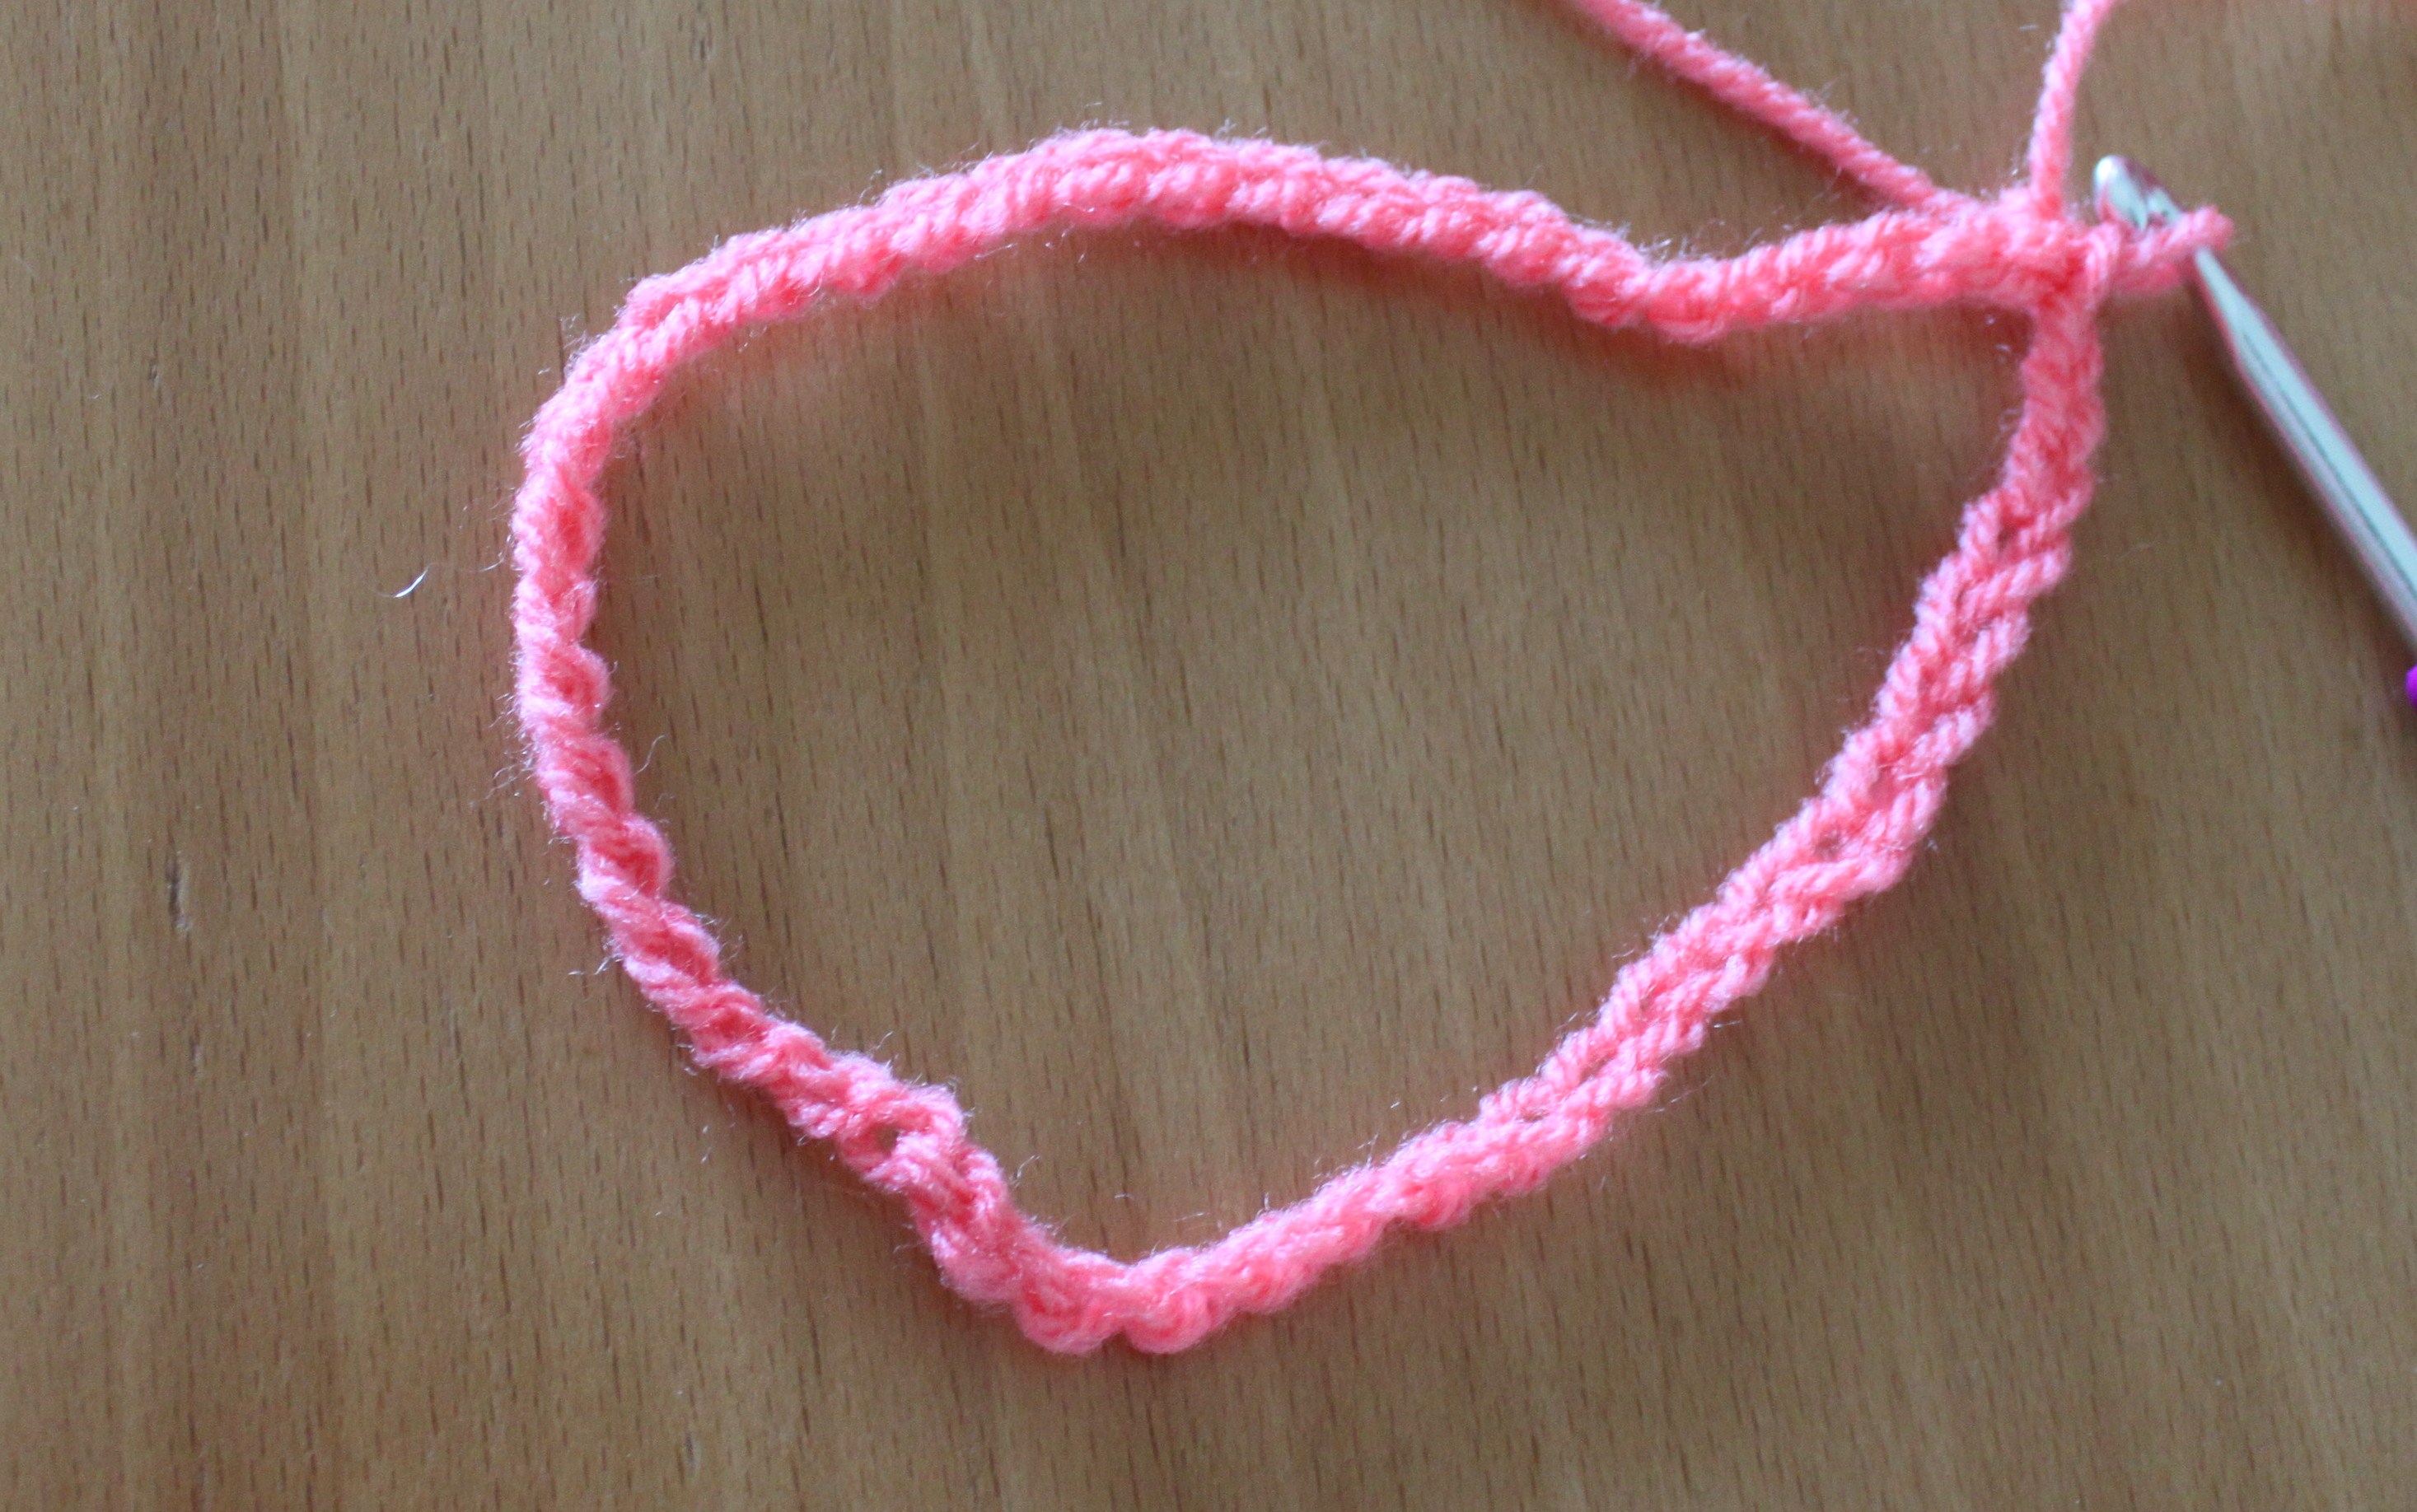
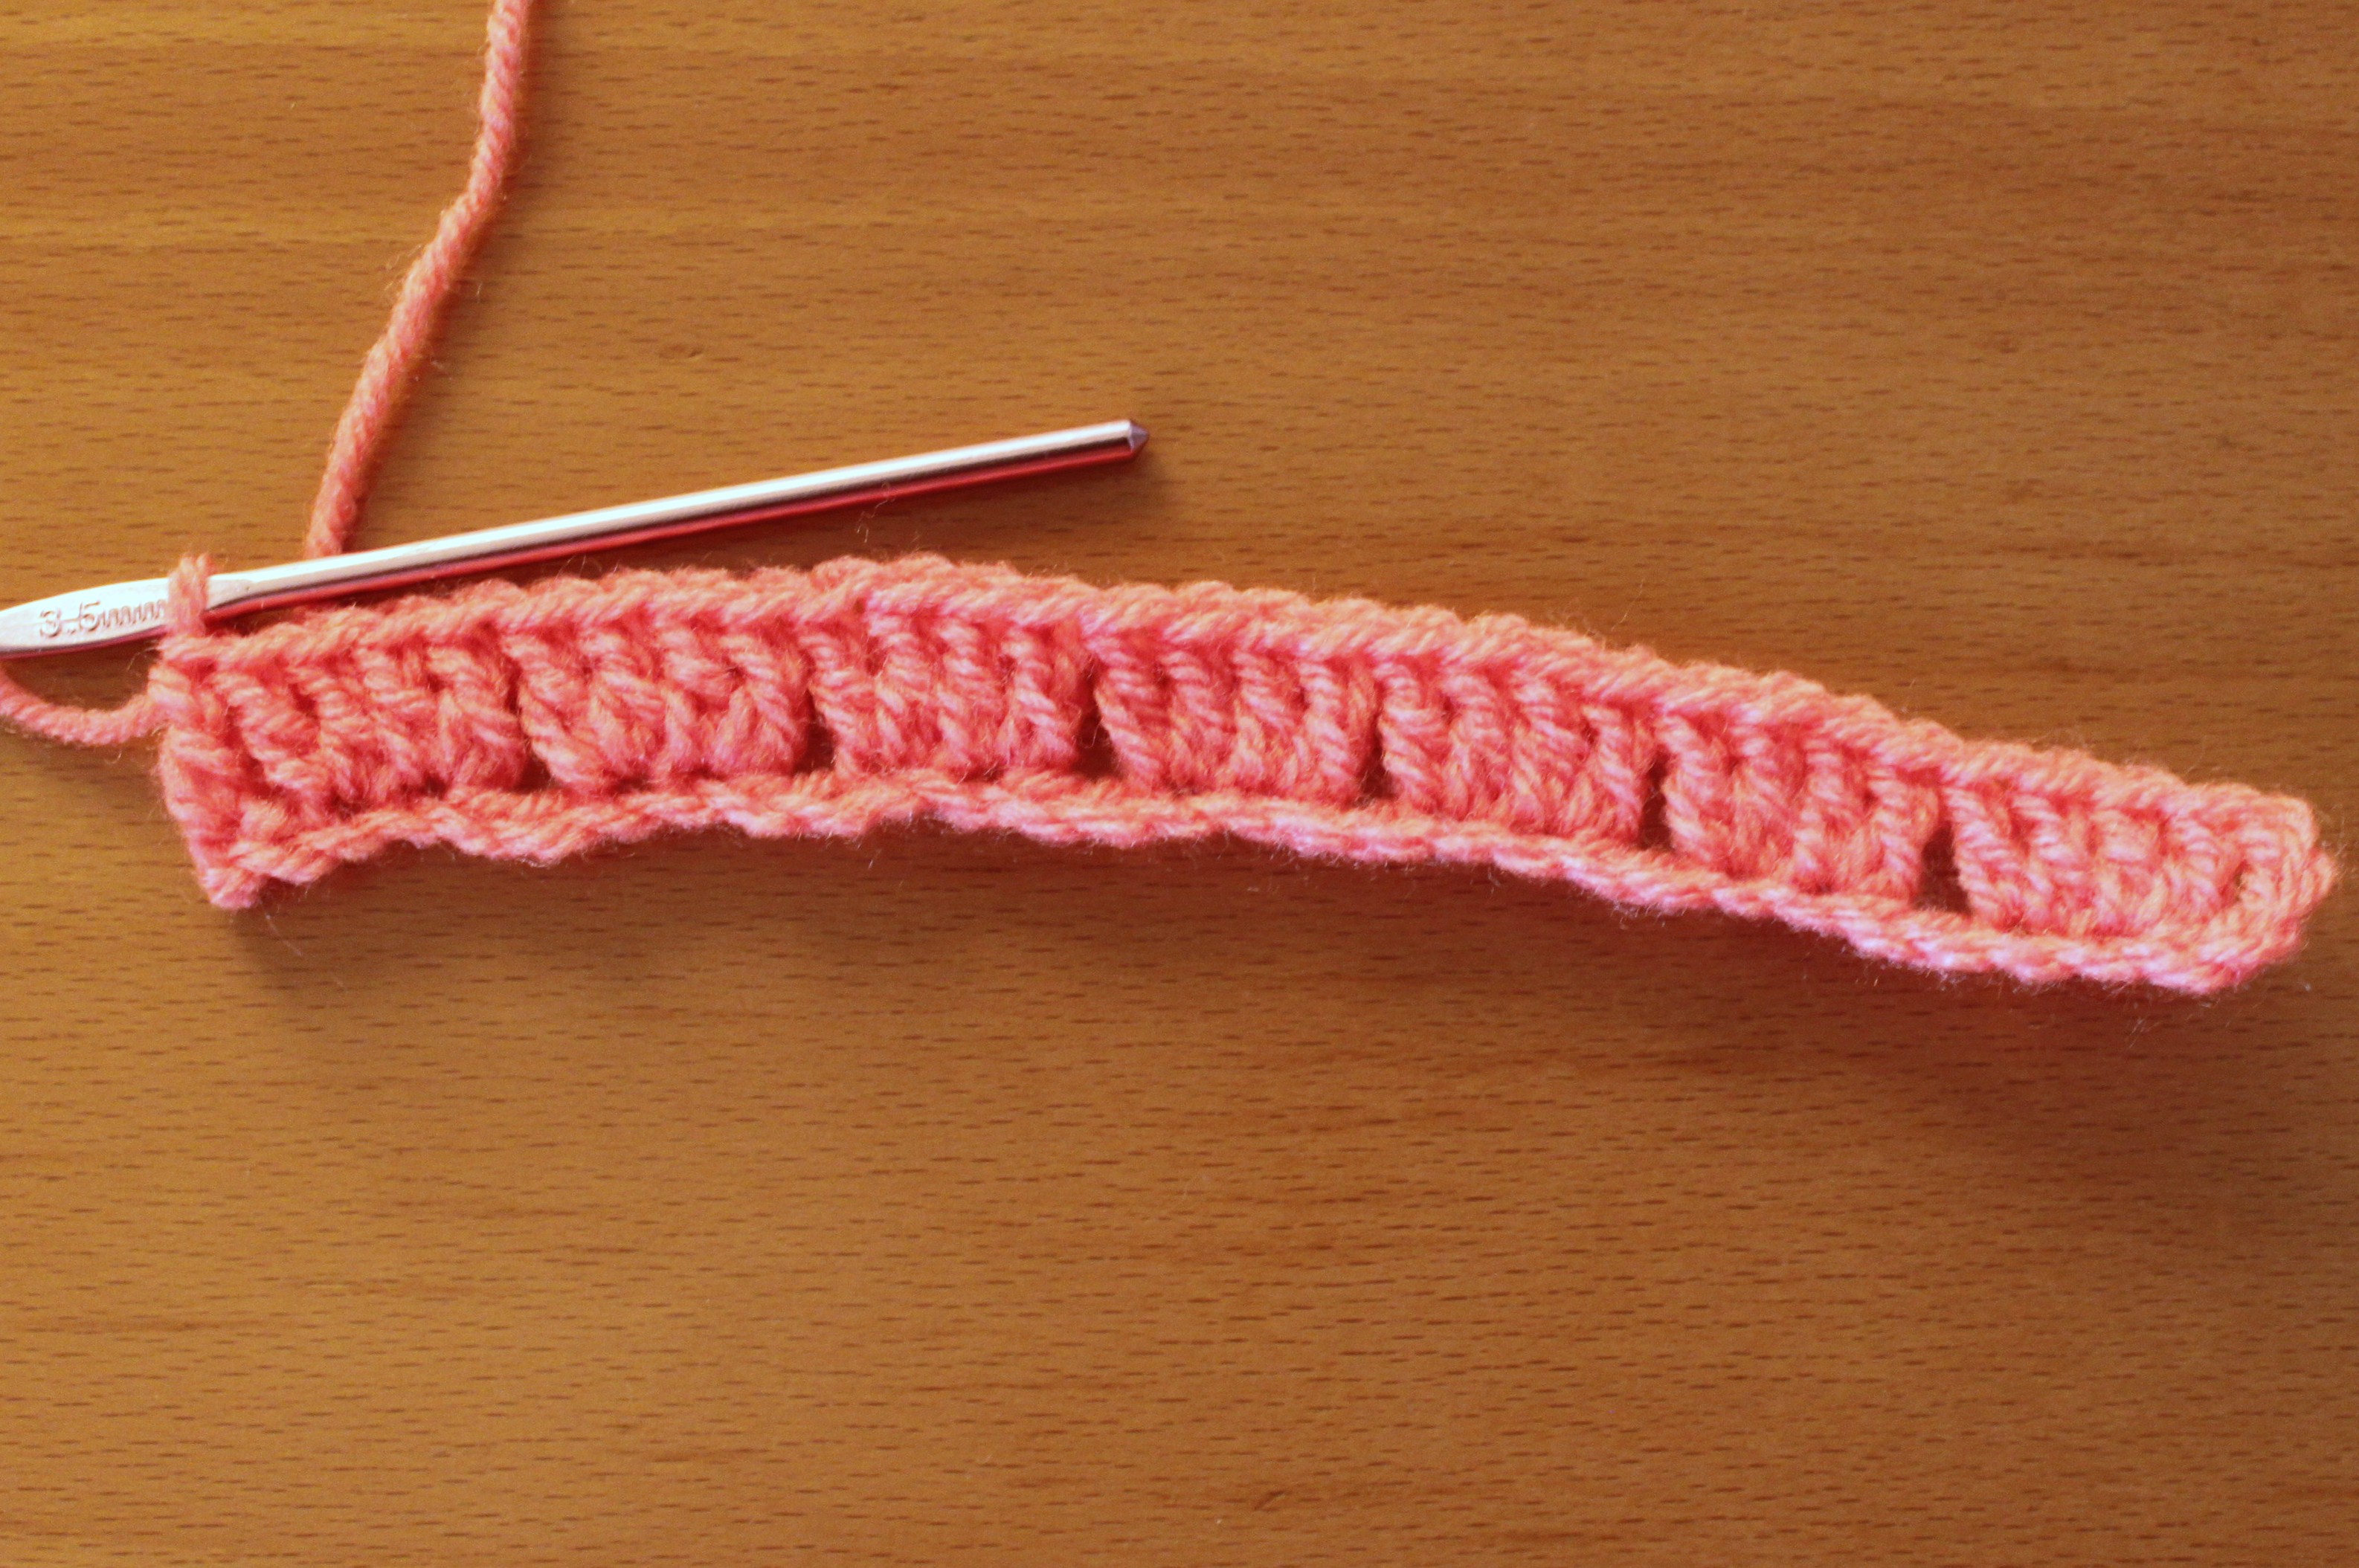
Row1: 2dc into the 5th ch from the hook, and 2dc into next ch, skip next 2 chs and 2dc into next 2 chs and continue till the end of the row. 1 dc into the last ch of the row.
IMG_0032

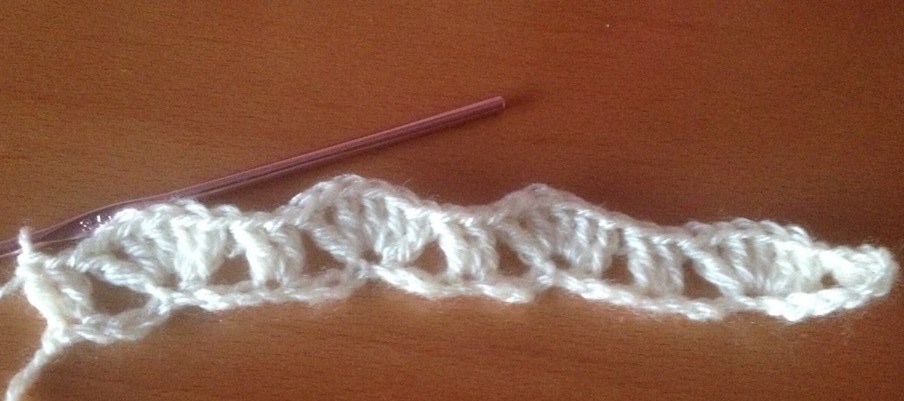
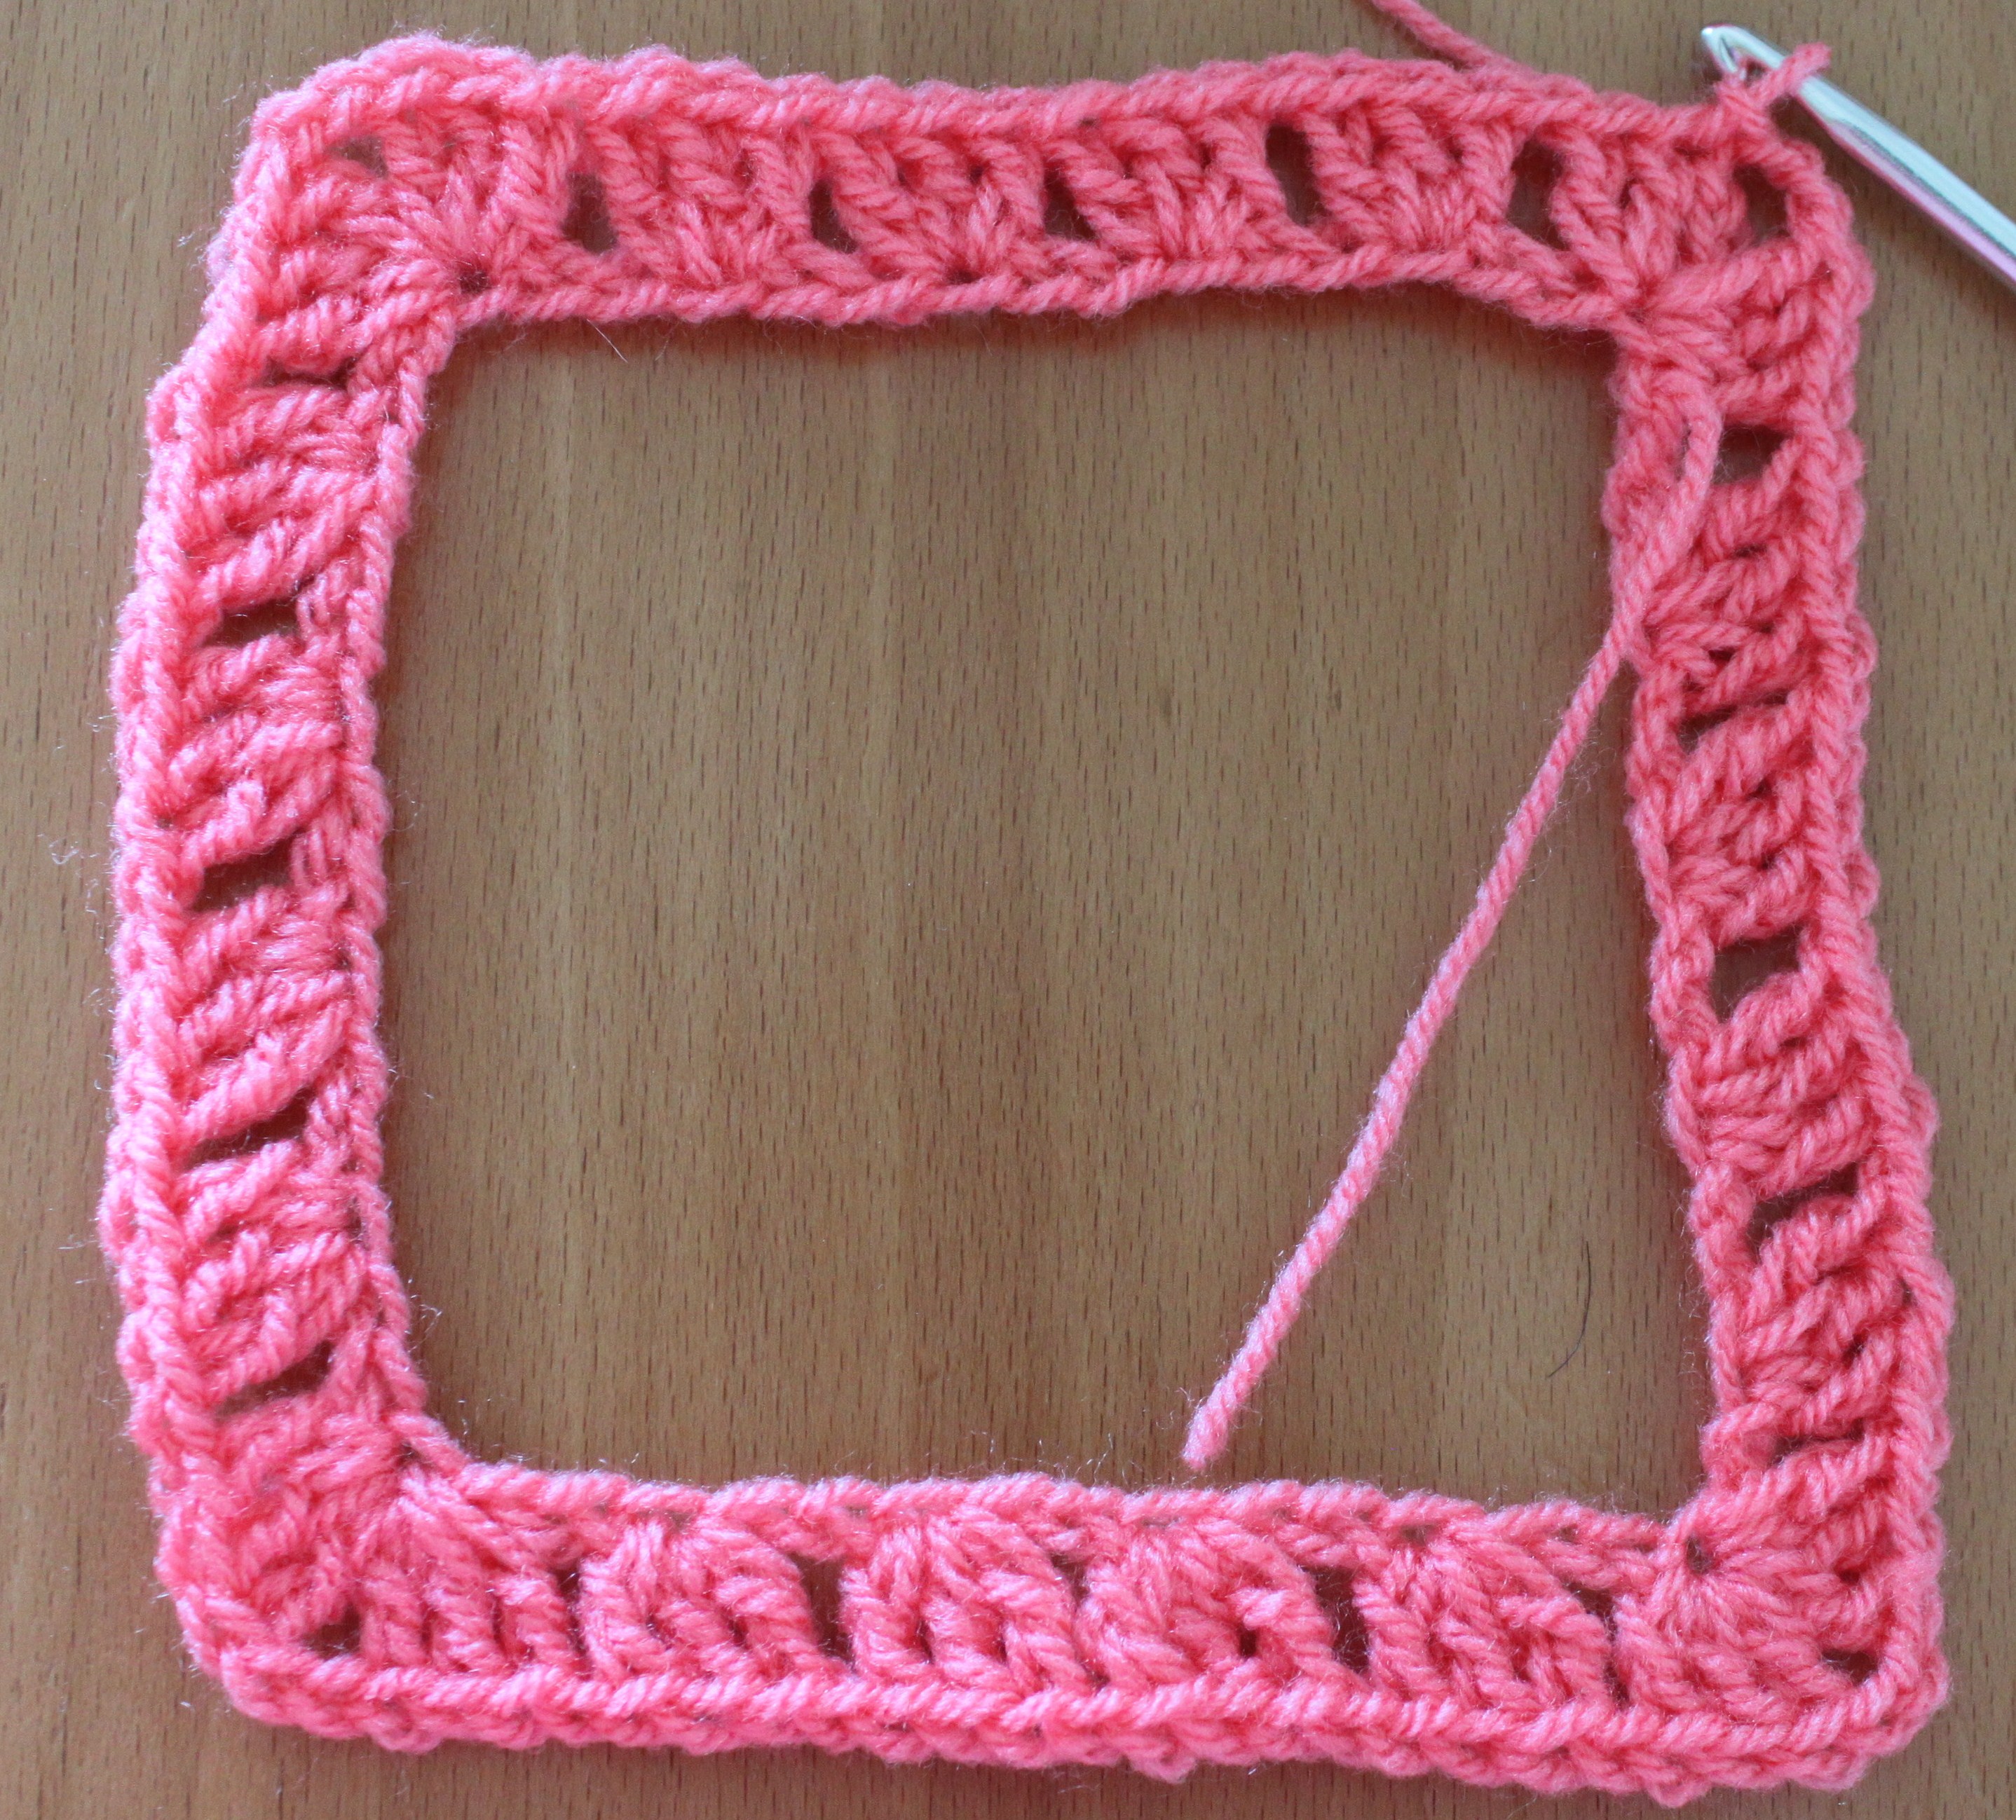
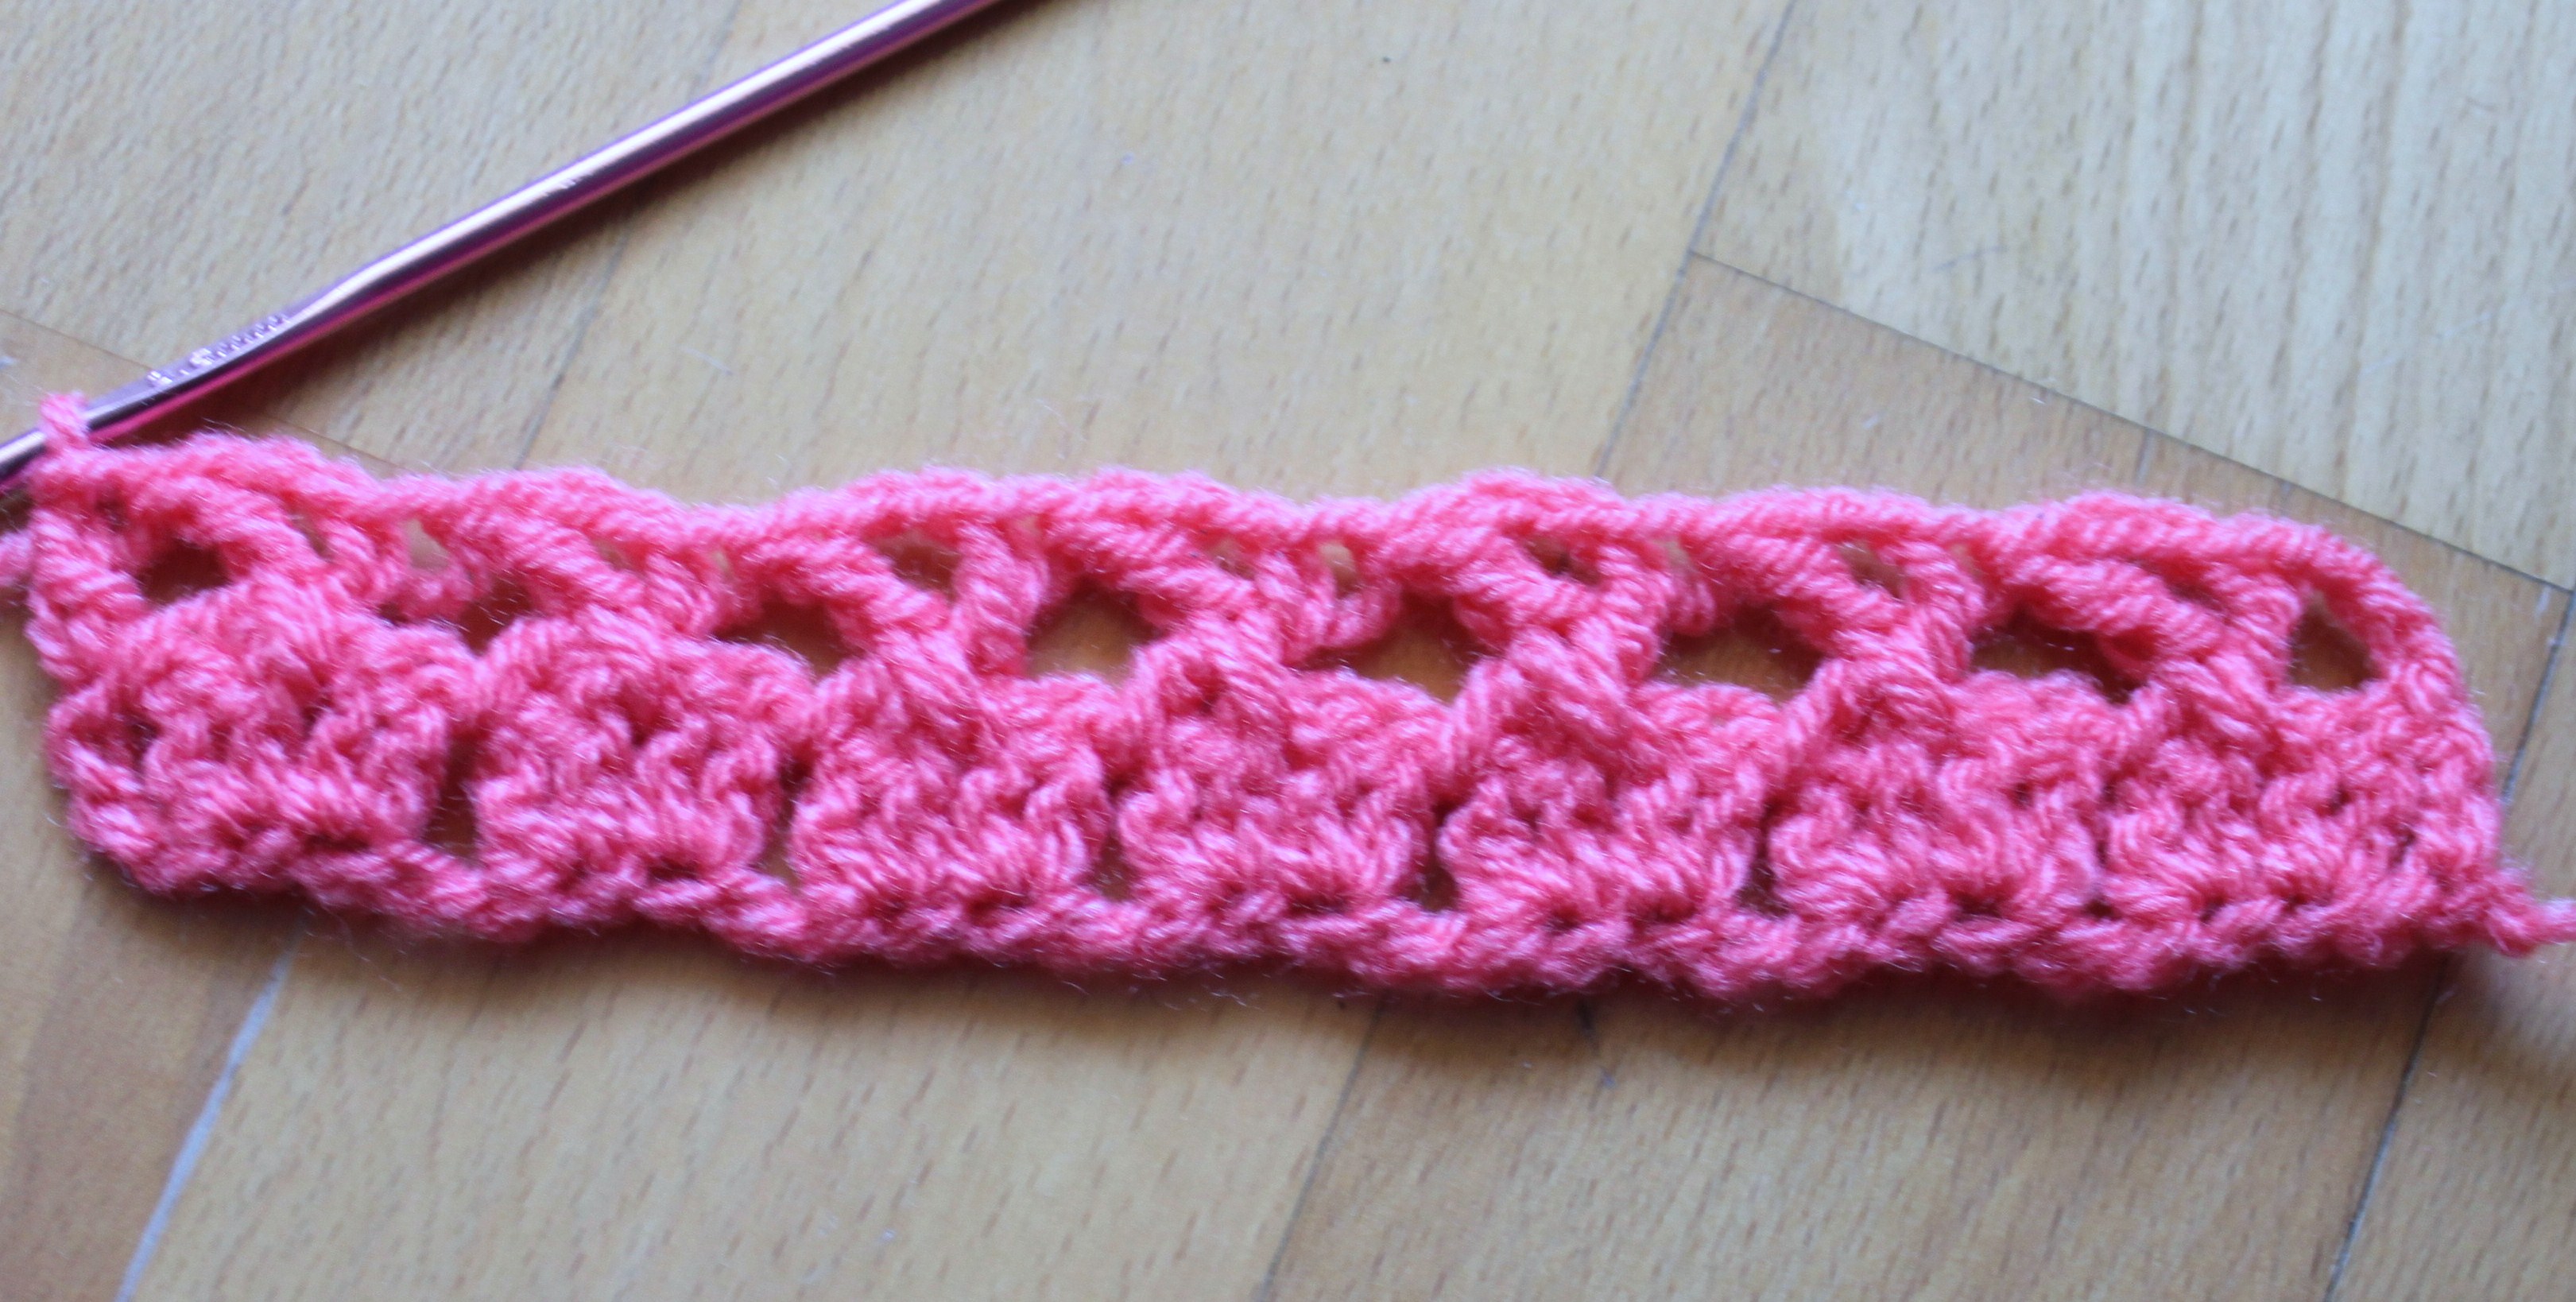
Row2 :  ch3 skip the 4dc and tr into the space between the 1st and 2nd 4dc cluster, ch2 tr into the space between 1st 2dc of the 1st 4dc cluster. 1 tr into the next space between 2nd and 3rd 4dc cluster  and continue till the end of the row. 1dc 
IMG_0038

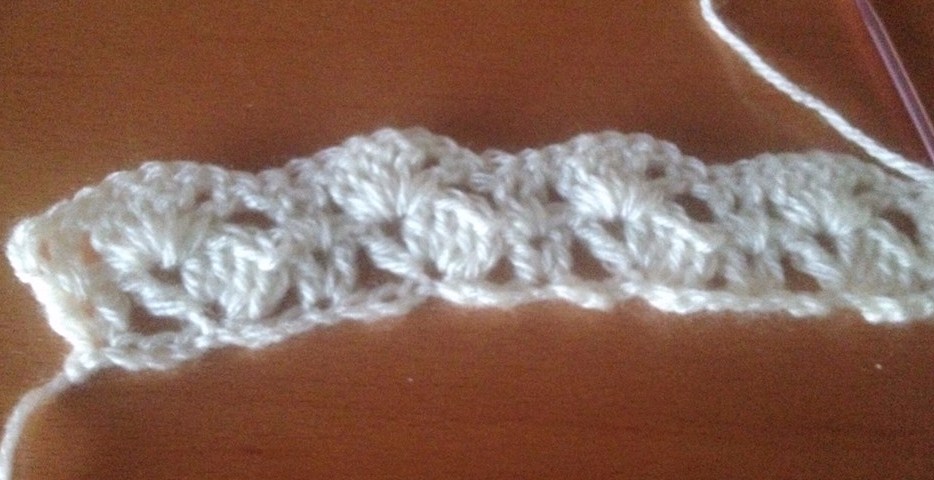
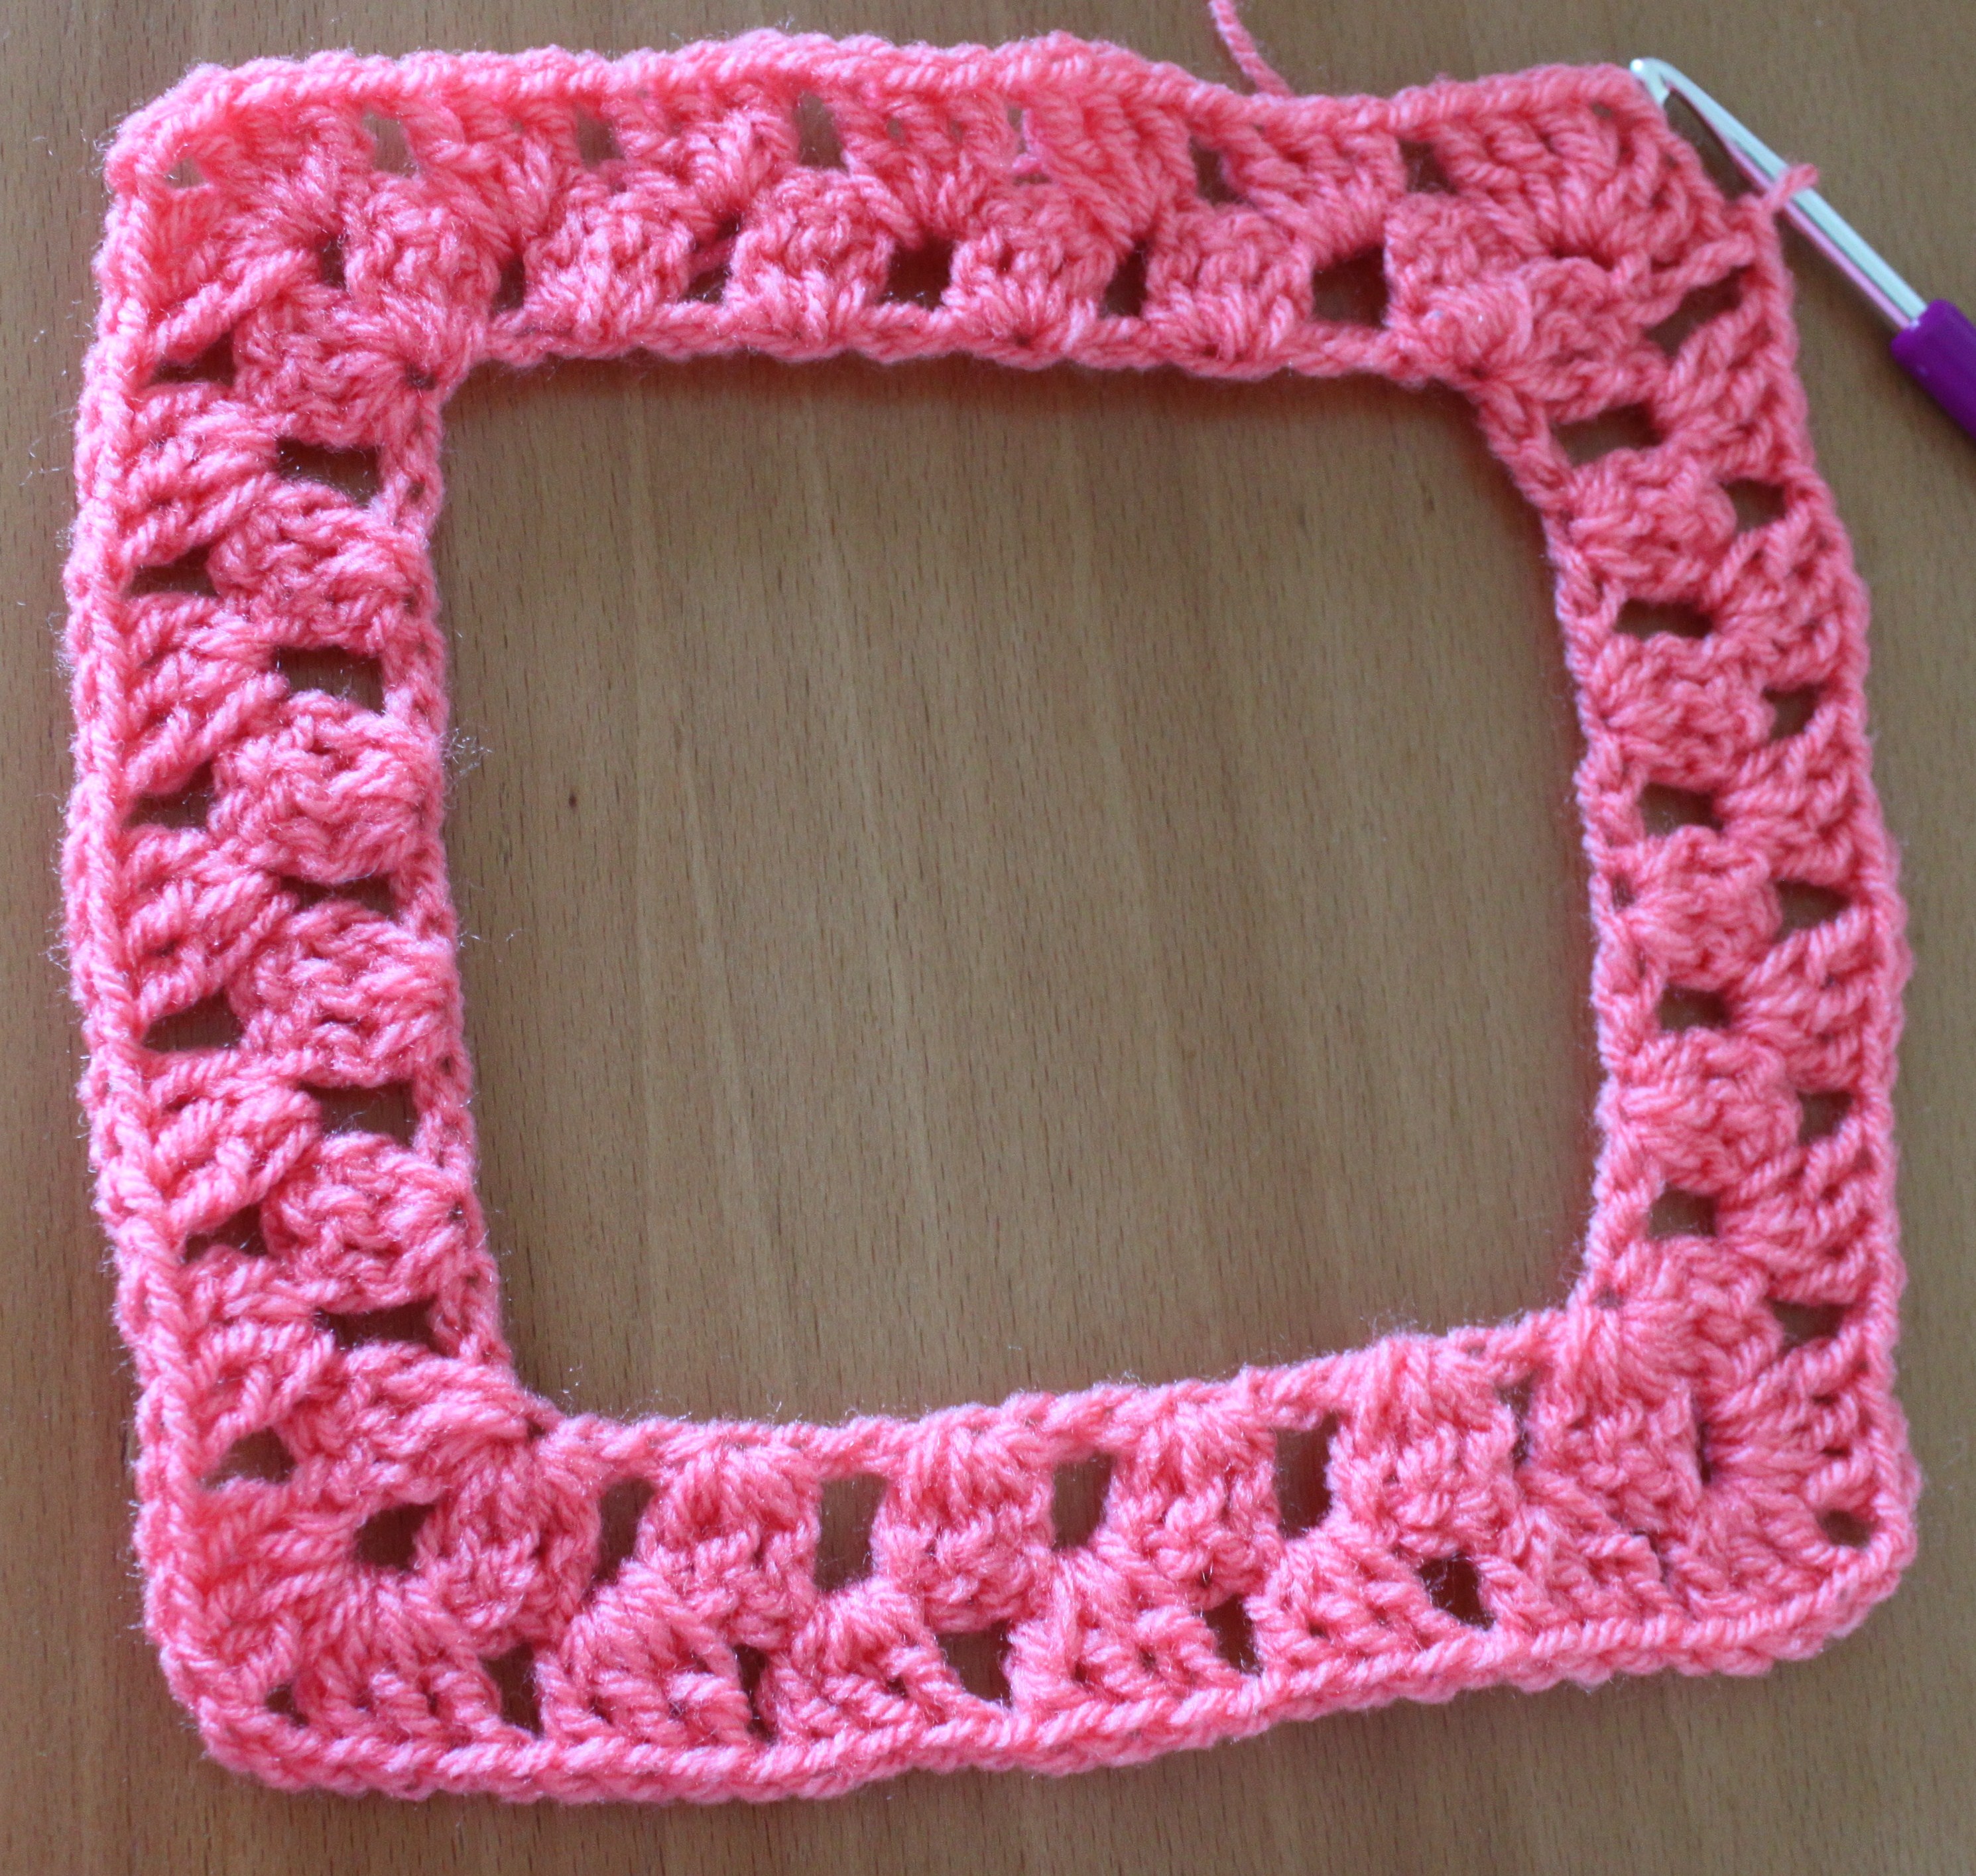
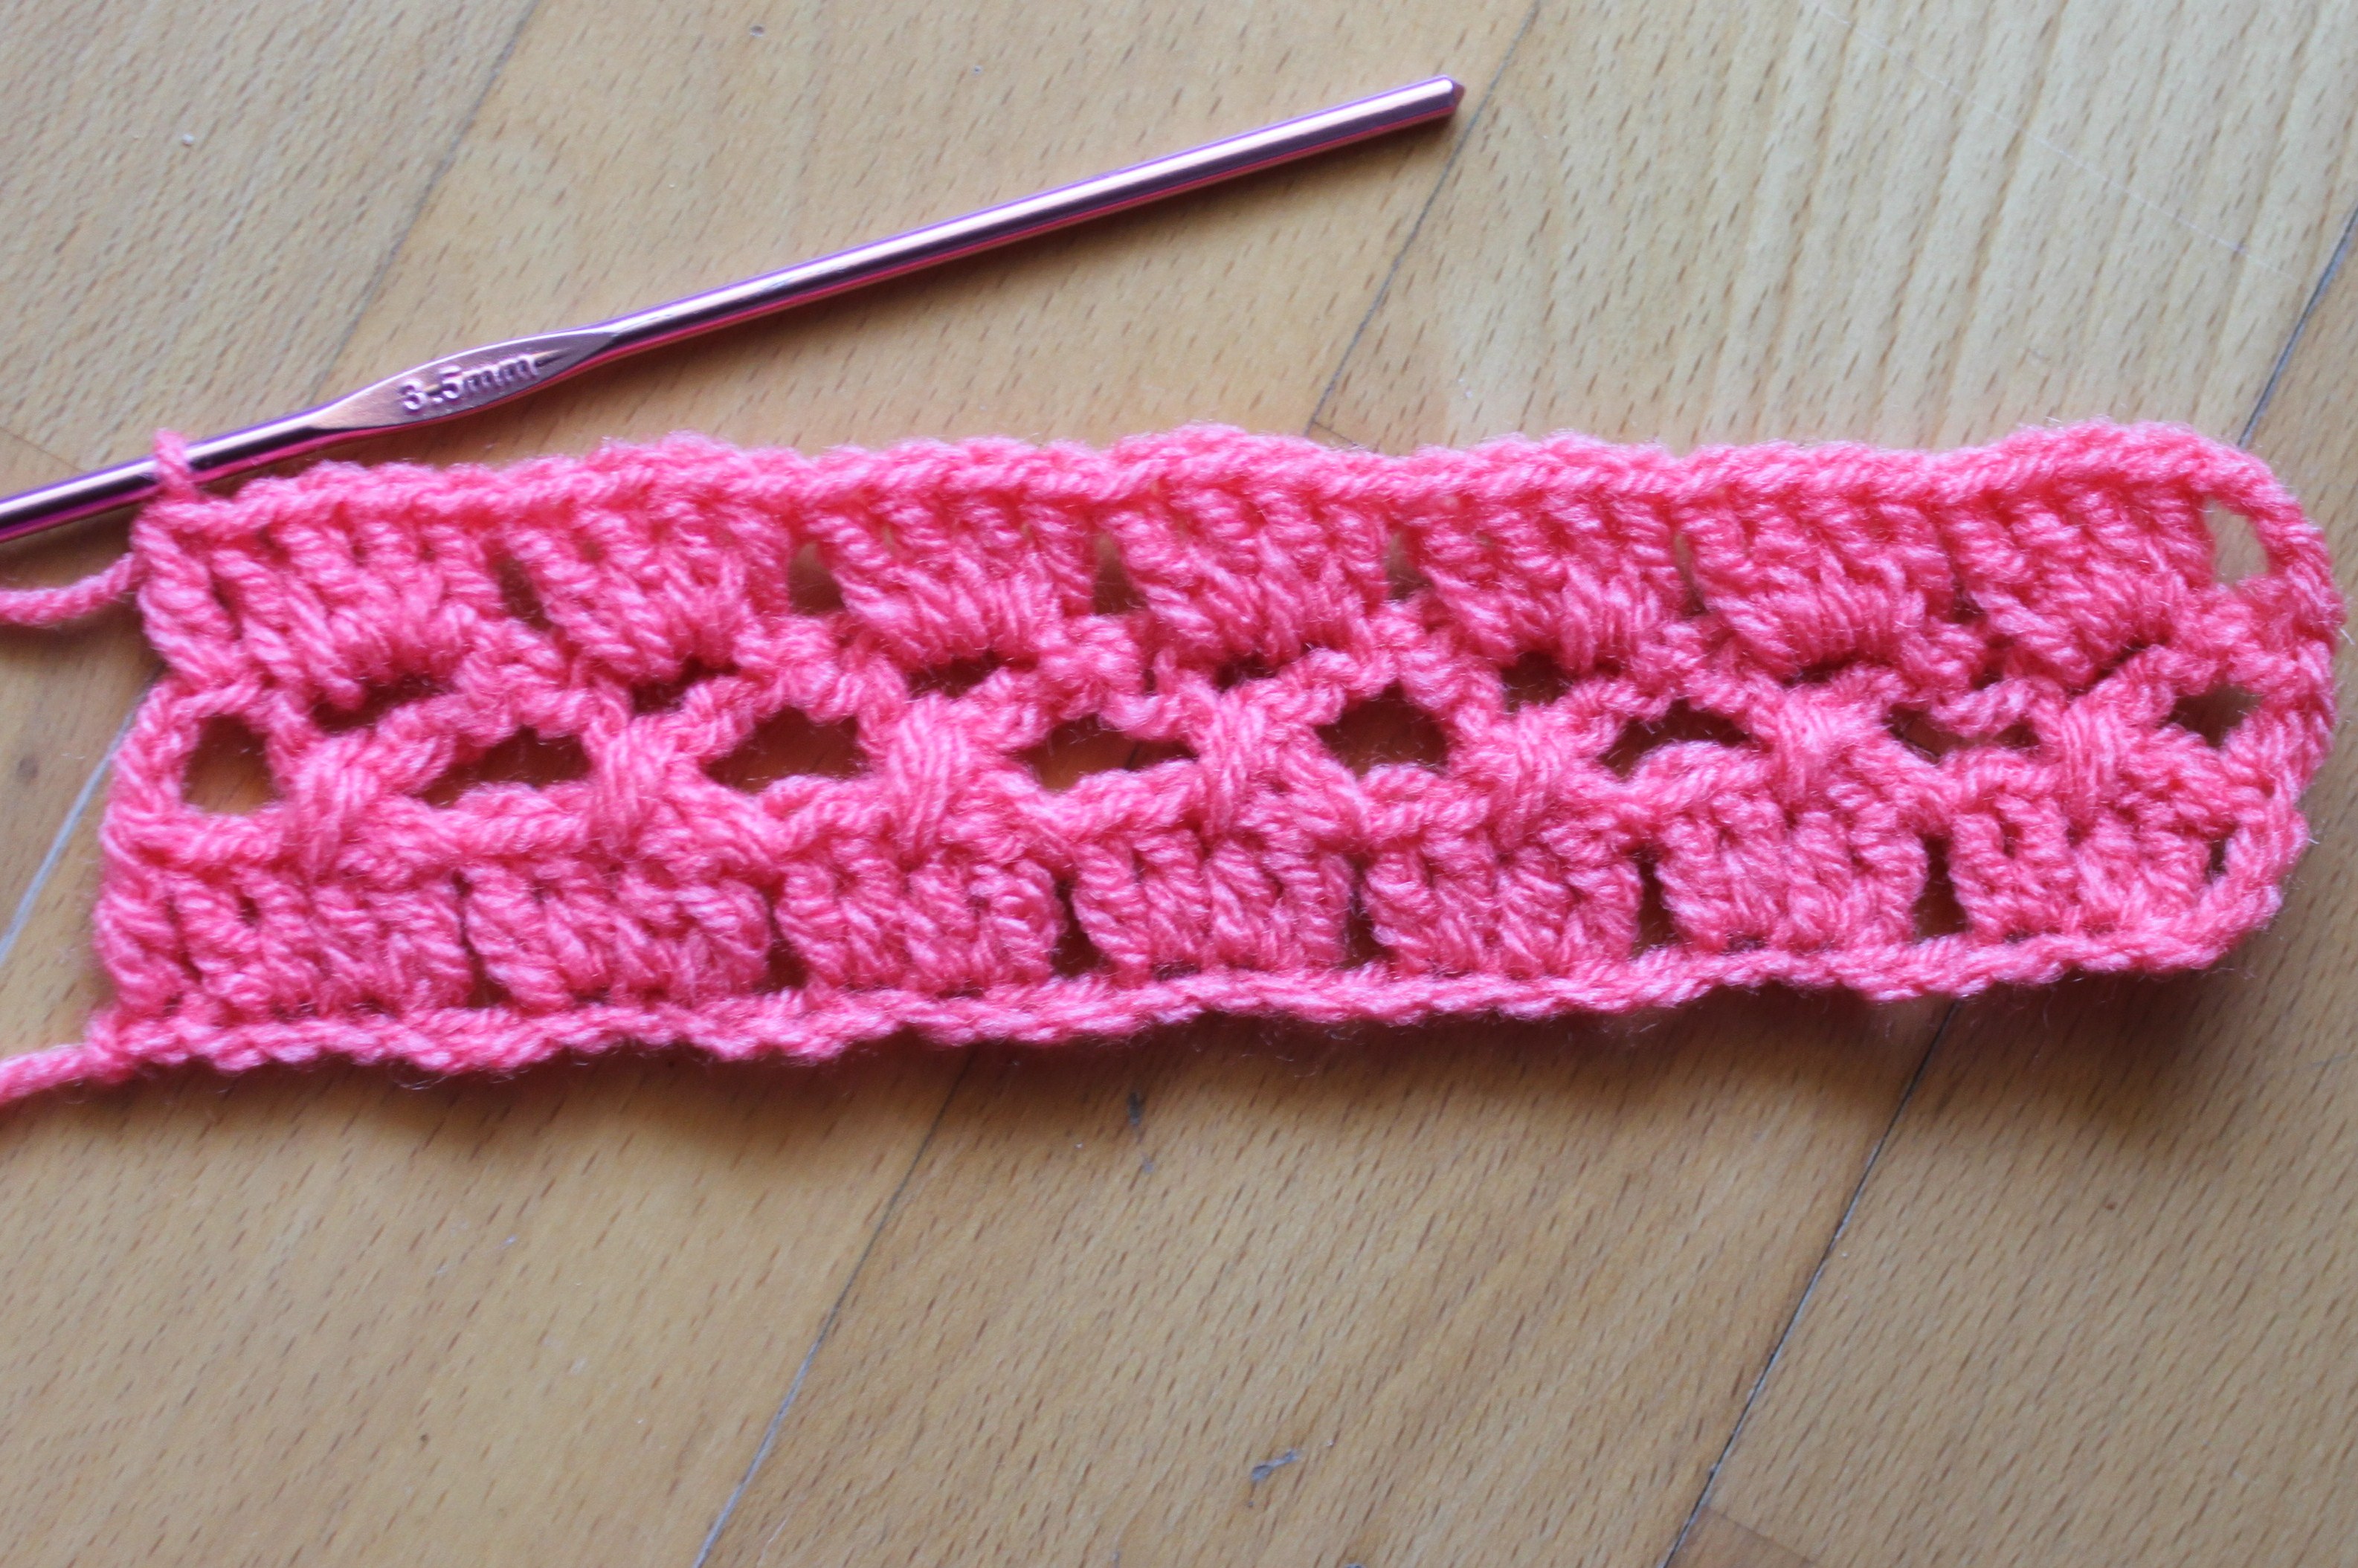
Row3 : ch3, 4dc into all the ch2 spaces till the end of the row and 1dc into the last st.
IMG_0040

Repeat row 2 and 3 till you reach the required measurement is reached.

Hope the tutorial was useful. Please share your views in the comment box. 

Happy crocheting


Wednesday, 1 July 2015

Commonly Used Abbreviations in Crochet


Hi friends here is an useful information about crocheting that is Abbreviations used in the written pattern. It is very difficult for the beginners to follow the instructions when these abbreviations are mentioned, So this is my small attempt to help those people who are in need of this.

Ch - Chain

Sc - Single crochet

Hdc - half double crochet

Dc - double crochet

Tr - treble crochet / Triple crochet

Dtr - double treble crochet

Sl st - Slip stitch

Sk - skip

Cl - cluster stitch

Beg - beginning

Dec - decreasing

Inc - increasing

Rs - right side

Ws  - wrong side

Sp - space

tog - together

Yo - yarn over

Hope this information was useful. Any queries please feel free to ask me in the comment box below.
Please comment and share

Happy Crocheting


Tuesday, 30 June 2015

Shell stitch for summer top - 7

1908112_1598120873777981_6870802311796582207_n
Hi friends here I come with one more new stitch pattern in our summer top stitches series. This is a simple and easy pattern to make and can be used in many projects like summer tops, shawl,scarf, frock, skirt, baby blanket etc, according to your creativity.
Here is a step by step tutorial for this pattern
abbreviations:
Ch – chain
Sc – single crochet
dc – double crochet
Special stitch (4dc , ch1, 1dc) = shell
This pattern is multiples of 8 + 4 chs
11698642_1598120777111324_8005263572725460414_n
Row 1: dc into the 4th ch from the hook, skip 3 chs and shell into next st, skip 3 chs and 2 dc into next st and continue till the end of the row. Row ends with 2 dc.
11046256_1598120813777987_8329333279284961829_n
Row 2: ch3 1dc into the space between 2dc of the previous row, shell into the ch 1 space of the previous row shell, 2dc into the space between 2dc of the previous row and continue till the end of the row, 
10530721_1598120847111317_4114918958680130655_n
Repeat row 2 till you reach  the required measurement.
Hope you enjoyed the tutorial, any queries regarding the pattern feel free to mention in the comment box below.
Please like, comment and share.
Happy crocheting 


Sunday, 21 June 2015

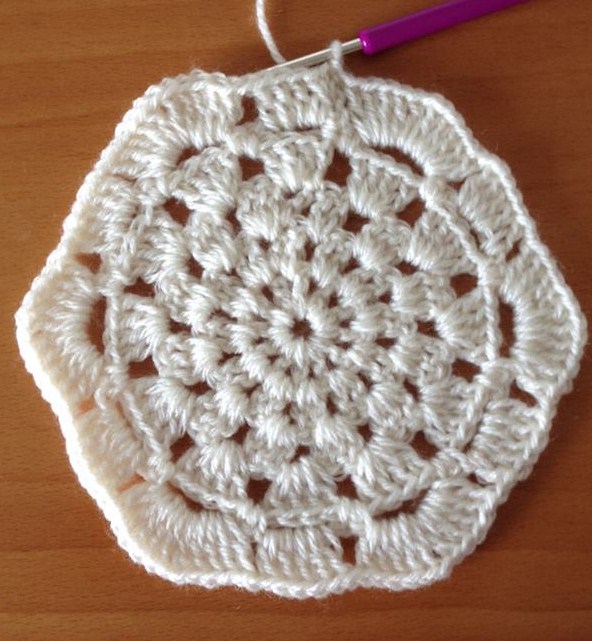
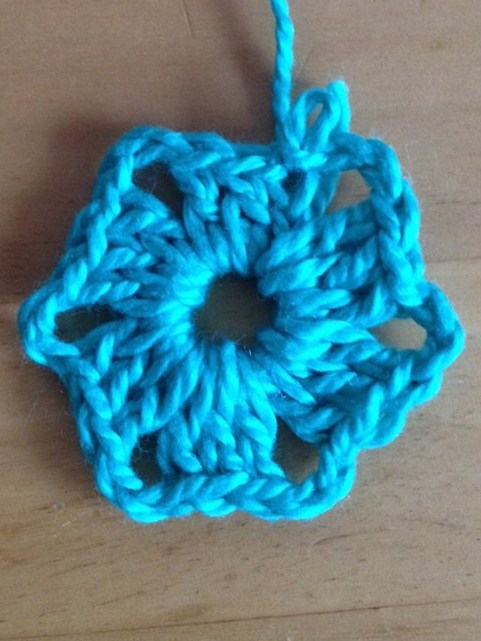
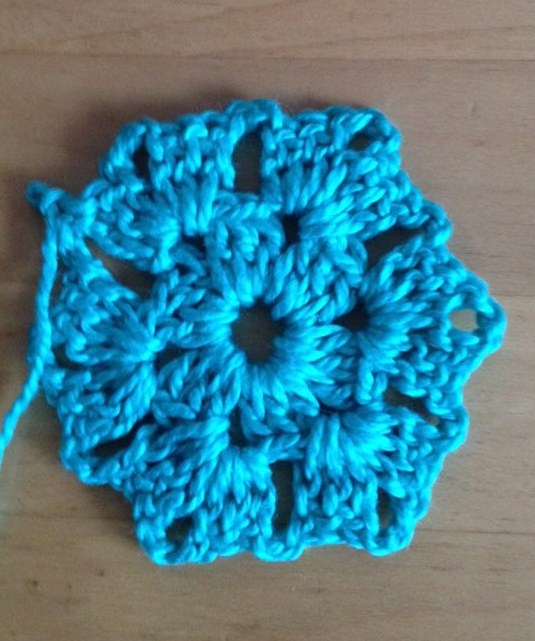
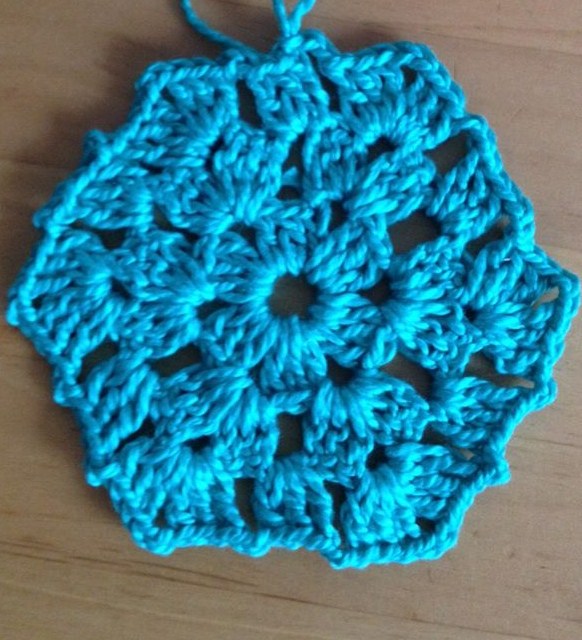
Granny Hexagon -2

11351178_1594661667457235_5621010313118179712_n
Hi friends here i come with one more new tutorial. This tutorial is about one more variation in granny hexagon, very simple and easy to make, can be used in many projects like coasters, table mats, shawl, blanket, clothing, coin purse, handbag and many more.
Abbreviations
Ch - chain
Dc- double crochet
Sl st  - slip stitch
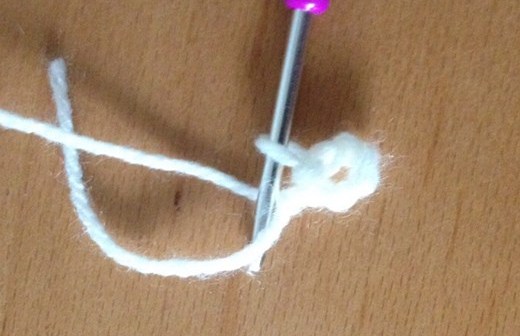
ch6 and sl st into the 1st ch to form a ring.
11535662_1594661484123920_5517766355685559302_n
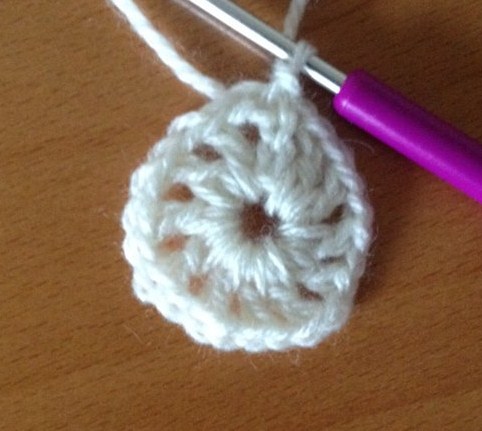
Round 1: ch4 (considered as 1dc+ ch1) 1dc into the loop and ch1. (make total 12dc and 12 ch1 including ch3+1 ) join the round with sl st into the 3rd ch of the beginning st.
16914_1594661514123917_2746256699060013997_n
Round 2: ch3 turn the work 1dc into the same space. ch1 2dc or V stitch+ch1 in every ch1 space of previous round. ch1 and join the round with a sl st .
10361323_1594661534123915_7389602805279940856_n
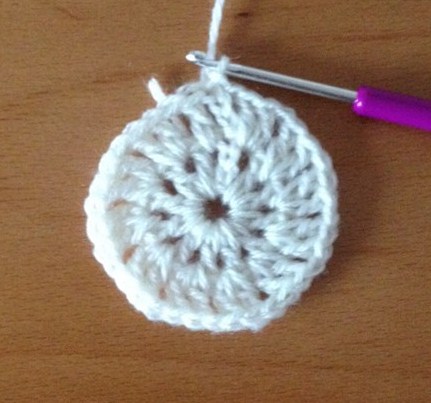
Round 3: ch3 turn the work and 2 dc into the ch1 space. ch1 3dc into the next ch1 space and continue till the end of the round. Join the round with a sl st.
10488159_1594661570790578_2453810845359528138_n
Round 4: ch3 turn the work and 3dc into the ch1 space . ch1 4dc into every ch1 space and continue till the end of the round. join the round with a sl st.
11535844_1594661634123905_9040674489268502623_n
Round 5: ch1 turn the work and sc into the ch1 space, ch4 2sc into the next ch1 space and contine till the end of the round. and join the round with a sl st into the ch1 of the beginning st.
11535860_1594661607457241_3091297278393888123_n
Round 6: ch3 turn the work and 4dc into the ch4 sp. ch1 5dc- ch1- 5dc into the next ch4 space, (5dc,ch1, 5dc-ch1-5dc, ch1, 5dc, ch1, 5dc-ch1-5dc ) so that you will have 6 corners. join the round with a sl st.
11351178_1594661667457235_5621010313118179712_n
Hope the tutorial was helpful. 
Please Like,comment and Share.

Happy Crocheting 


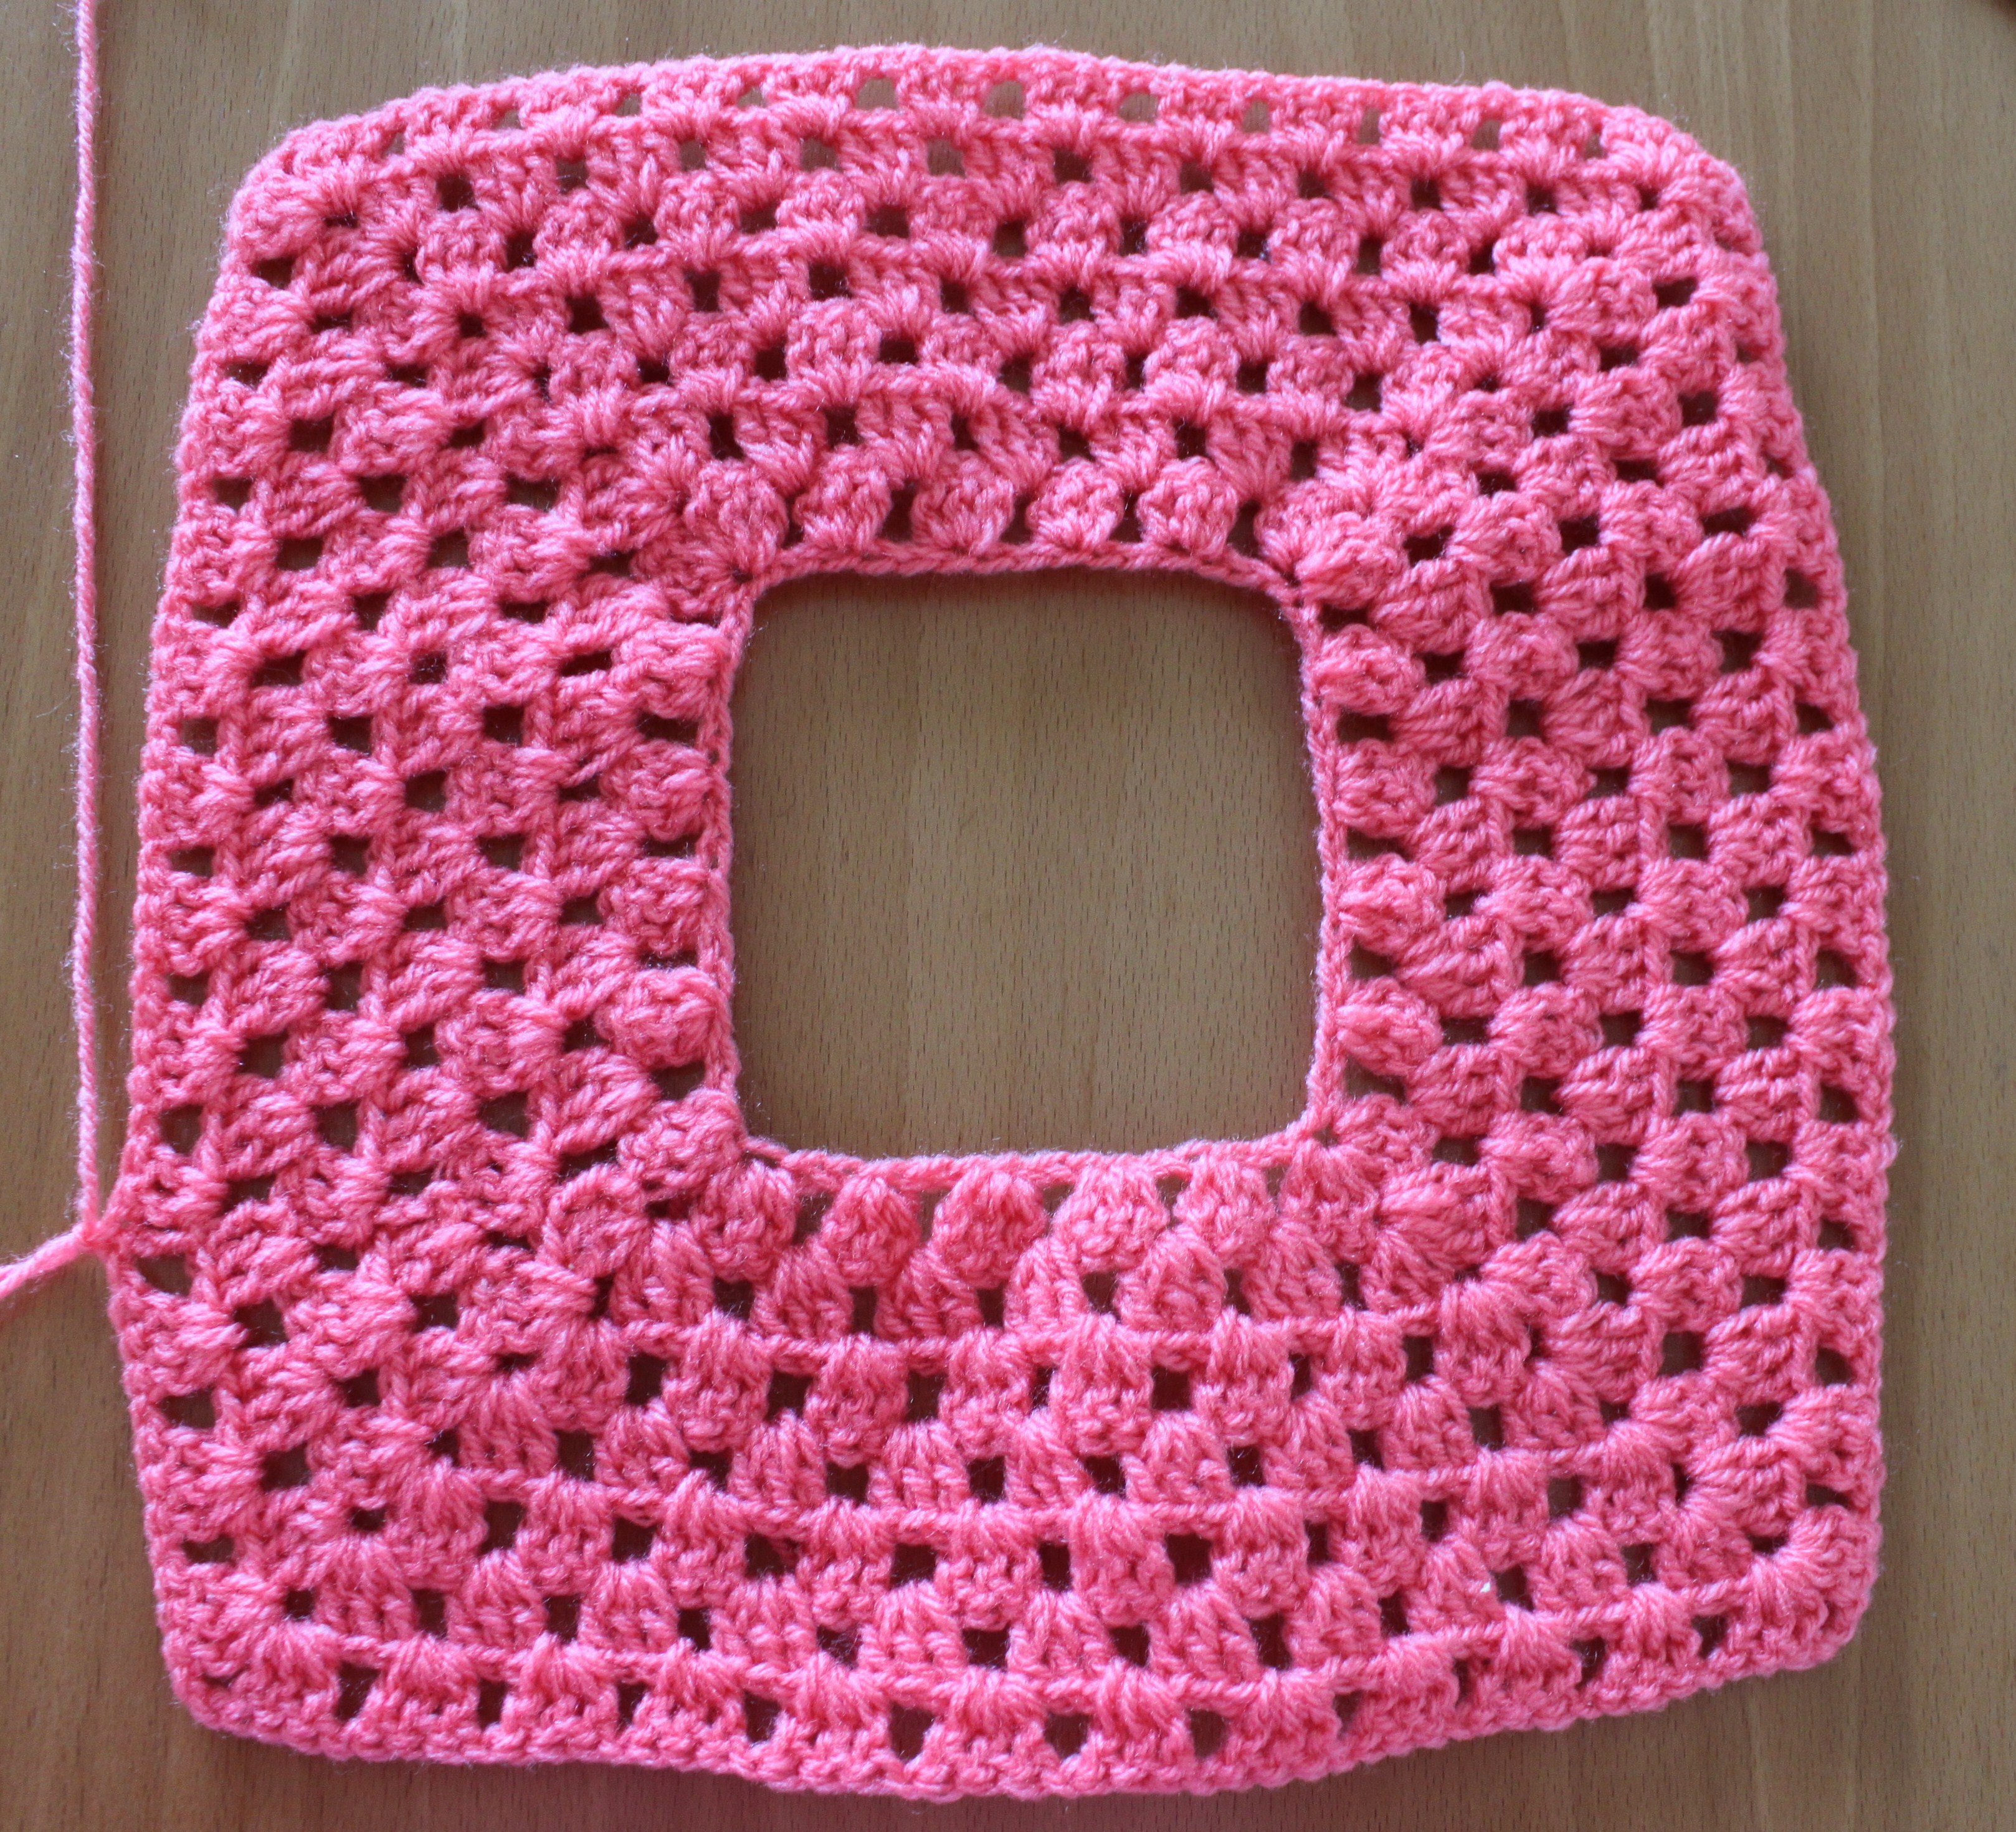
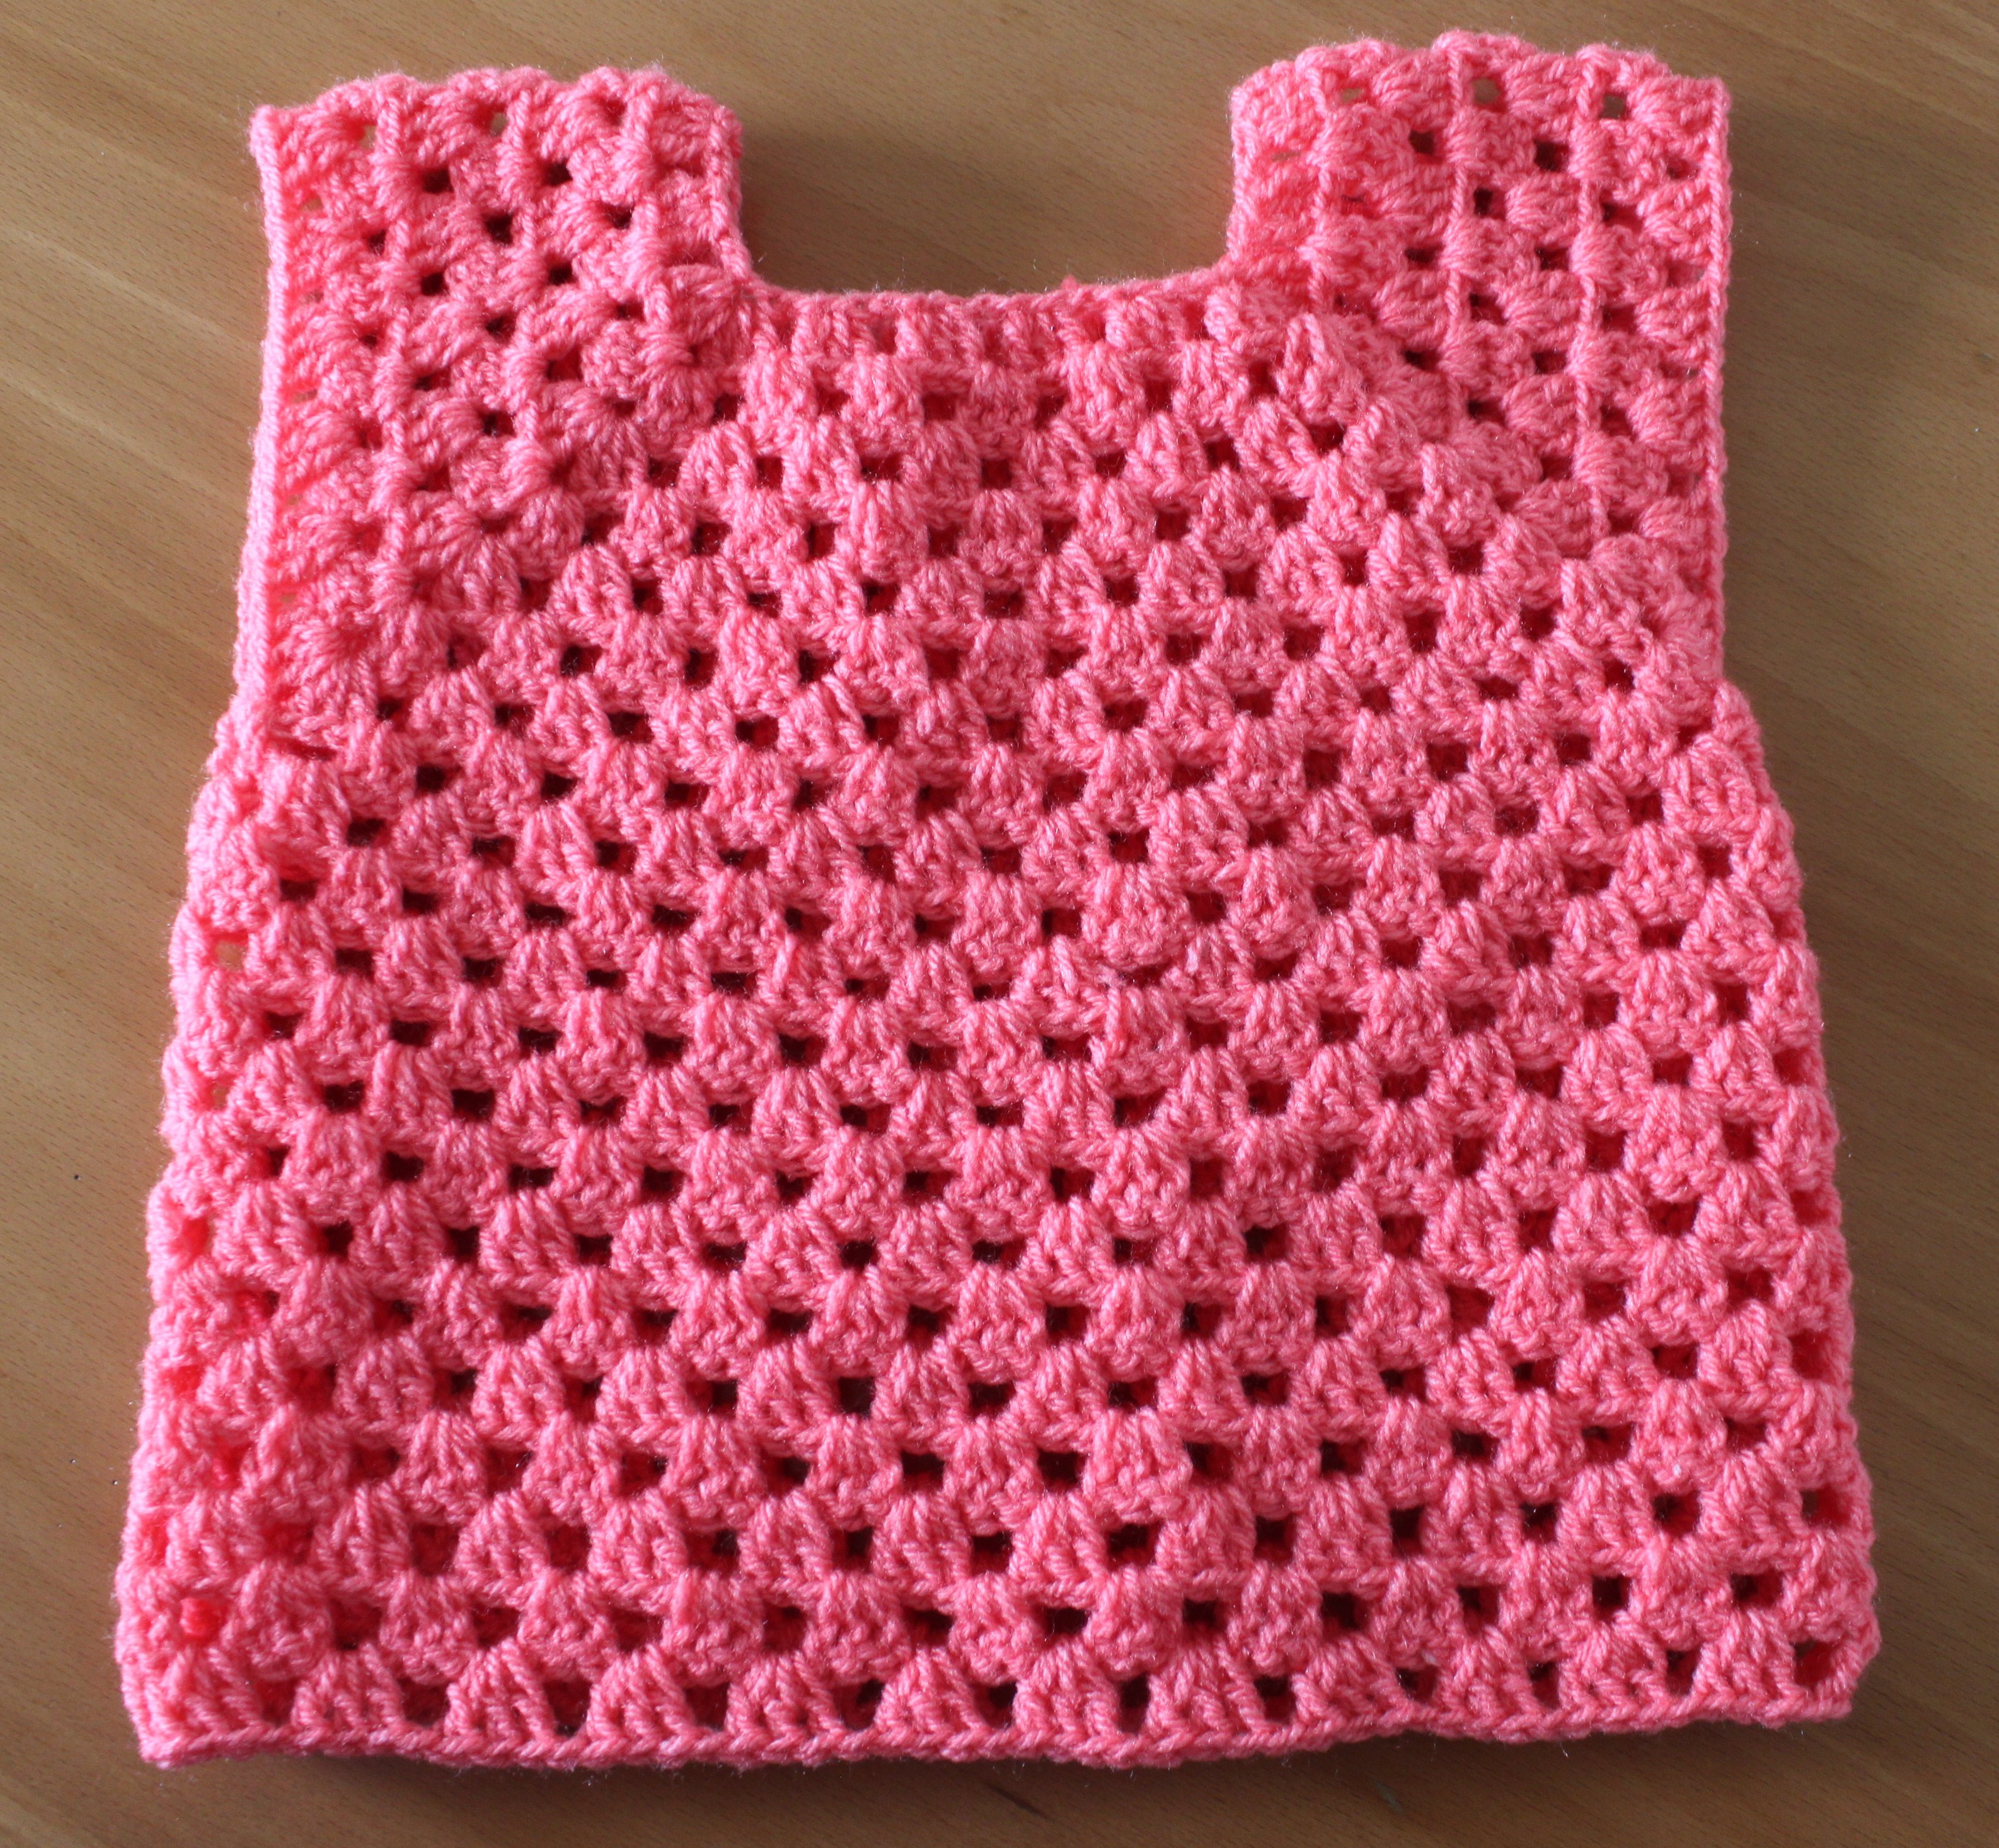
Granny top for all ages

IMG_0018
Hi friends today i am here with one more new and exciting tutorial. This is a very simple and easy top to make for all ages. This can be done even by the beginners too. Here in the tutorial i have made a top for my 2 yr old daughter. I have used 3.5mm crochet hook, you can use any yarn and any hook size of your choice.
As i mentioned  this pattern is for all ages. Here i am not going to teach you by number counts but by measurements. Hope you will enjoy this pattern.
Take a tee- shirt for neck measurement
IMG_0450
This pattern is multiples of 3 stitches so when you are making a base ch you need to make multiples of 3 and should divide by 4
for example in the demo piece i have done 60 ch it is a multiple of 3 and if we divide by 4 we get 15 equal stitches. As our pattern has 4 corners. make a slip stitch into the 1st ch and form a ring.
IMG_0451
Row 1 : ch3 and 2 dc into the same st, ch 1 skip 2 ch and 3dc into the next st. (in the demo pattern i will consider the 15th st as 1st corner st) . work pattern till 15 th ch. into the 15th ch 3dc ch2 3dc. skip 2 ch  and 3dc into the next ch. leaving the 1st 3dc count the 3dc set or shell till the first corner. every side we should make the same no. of shells.and into the 1st st of the row work 3dc, ch2 and join with a slip st into the 3rd ch of the beginning st.
IMG_0453
Row 2: ch3 turn the work and 2dc into the same ch1 space, ch1 3dc into the next ch1 space till the corner ,into the corner ch2 space work 3dc-ch2-3dc., till the row ends and join with a sl st.
IMG_0454
Repeat row 2 till you reach the required measurement. For the demo piece i have done 7 rows. (make as many rows as required to  fit your shoulder measurement and chest measurement) 
IMG_0011
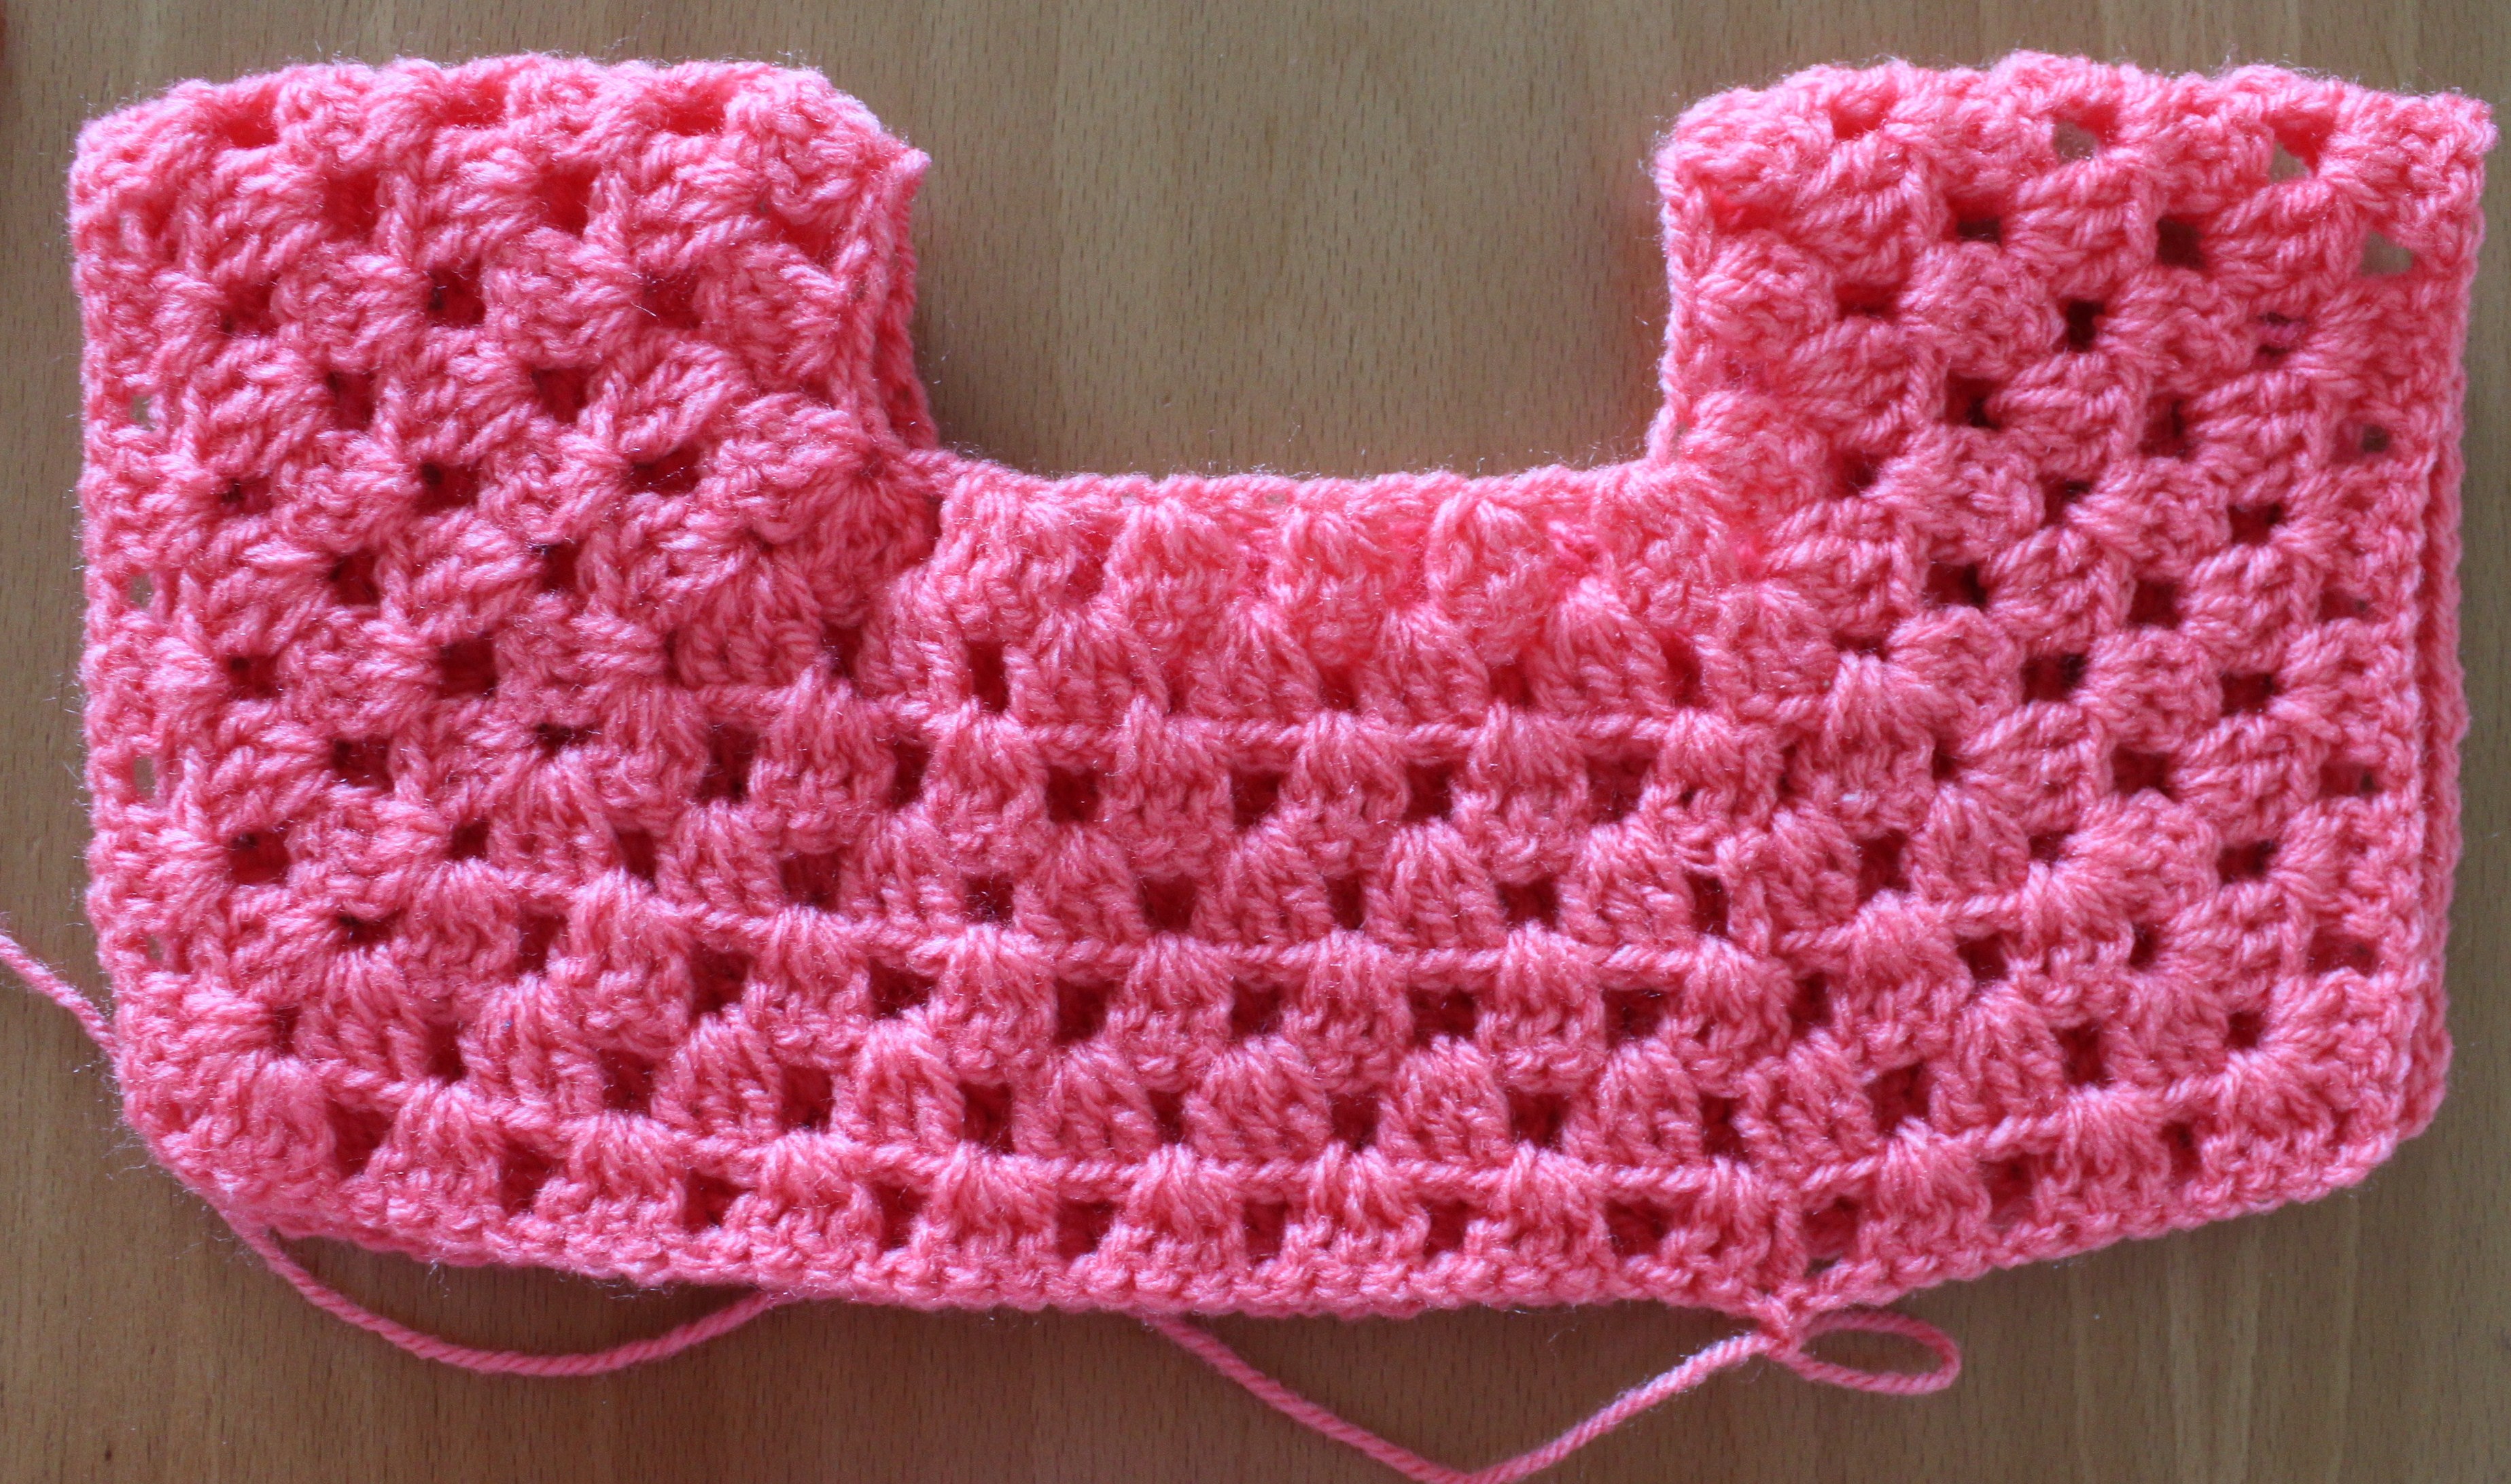
this is how it looks when you fold it into half.
IMG_0012
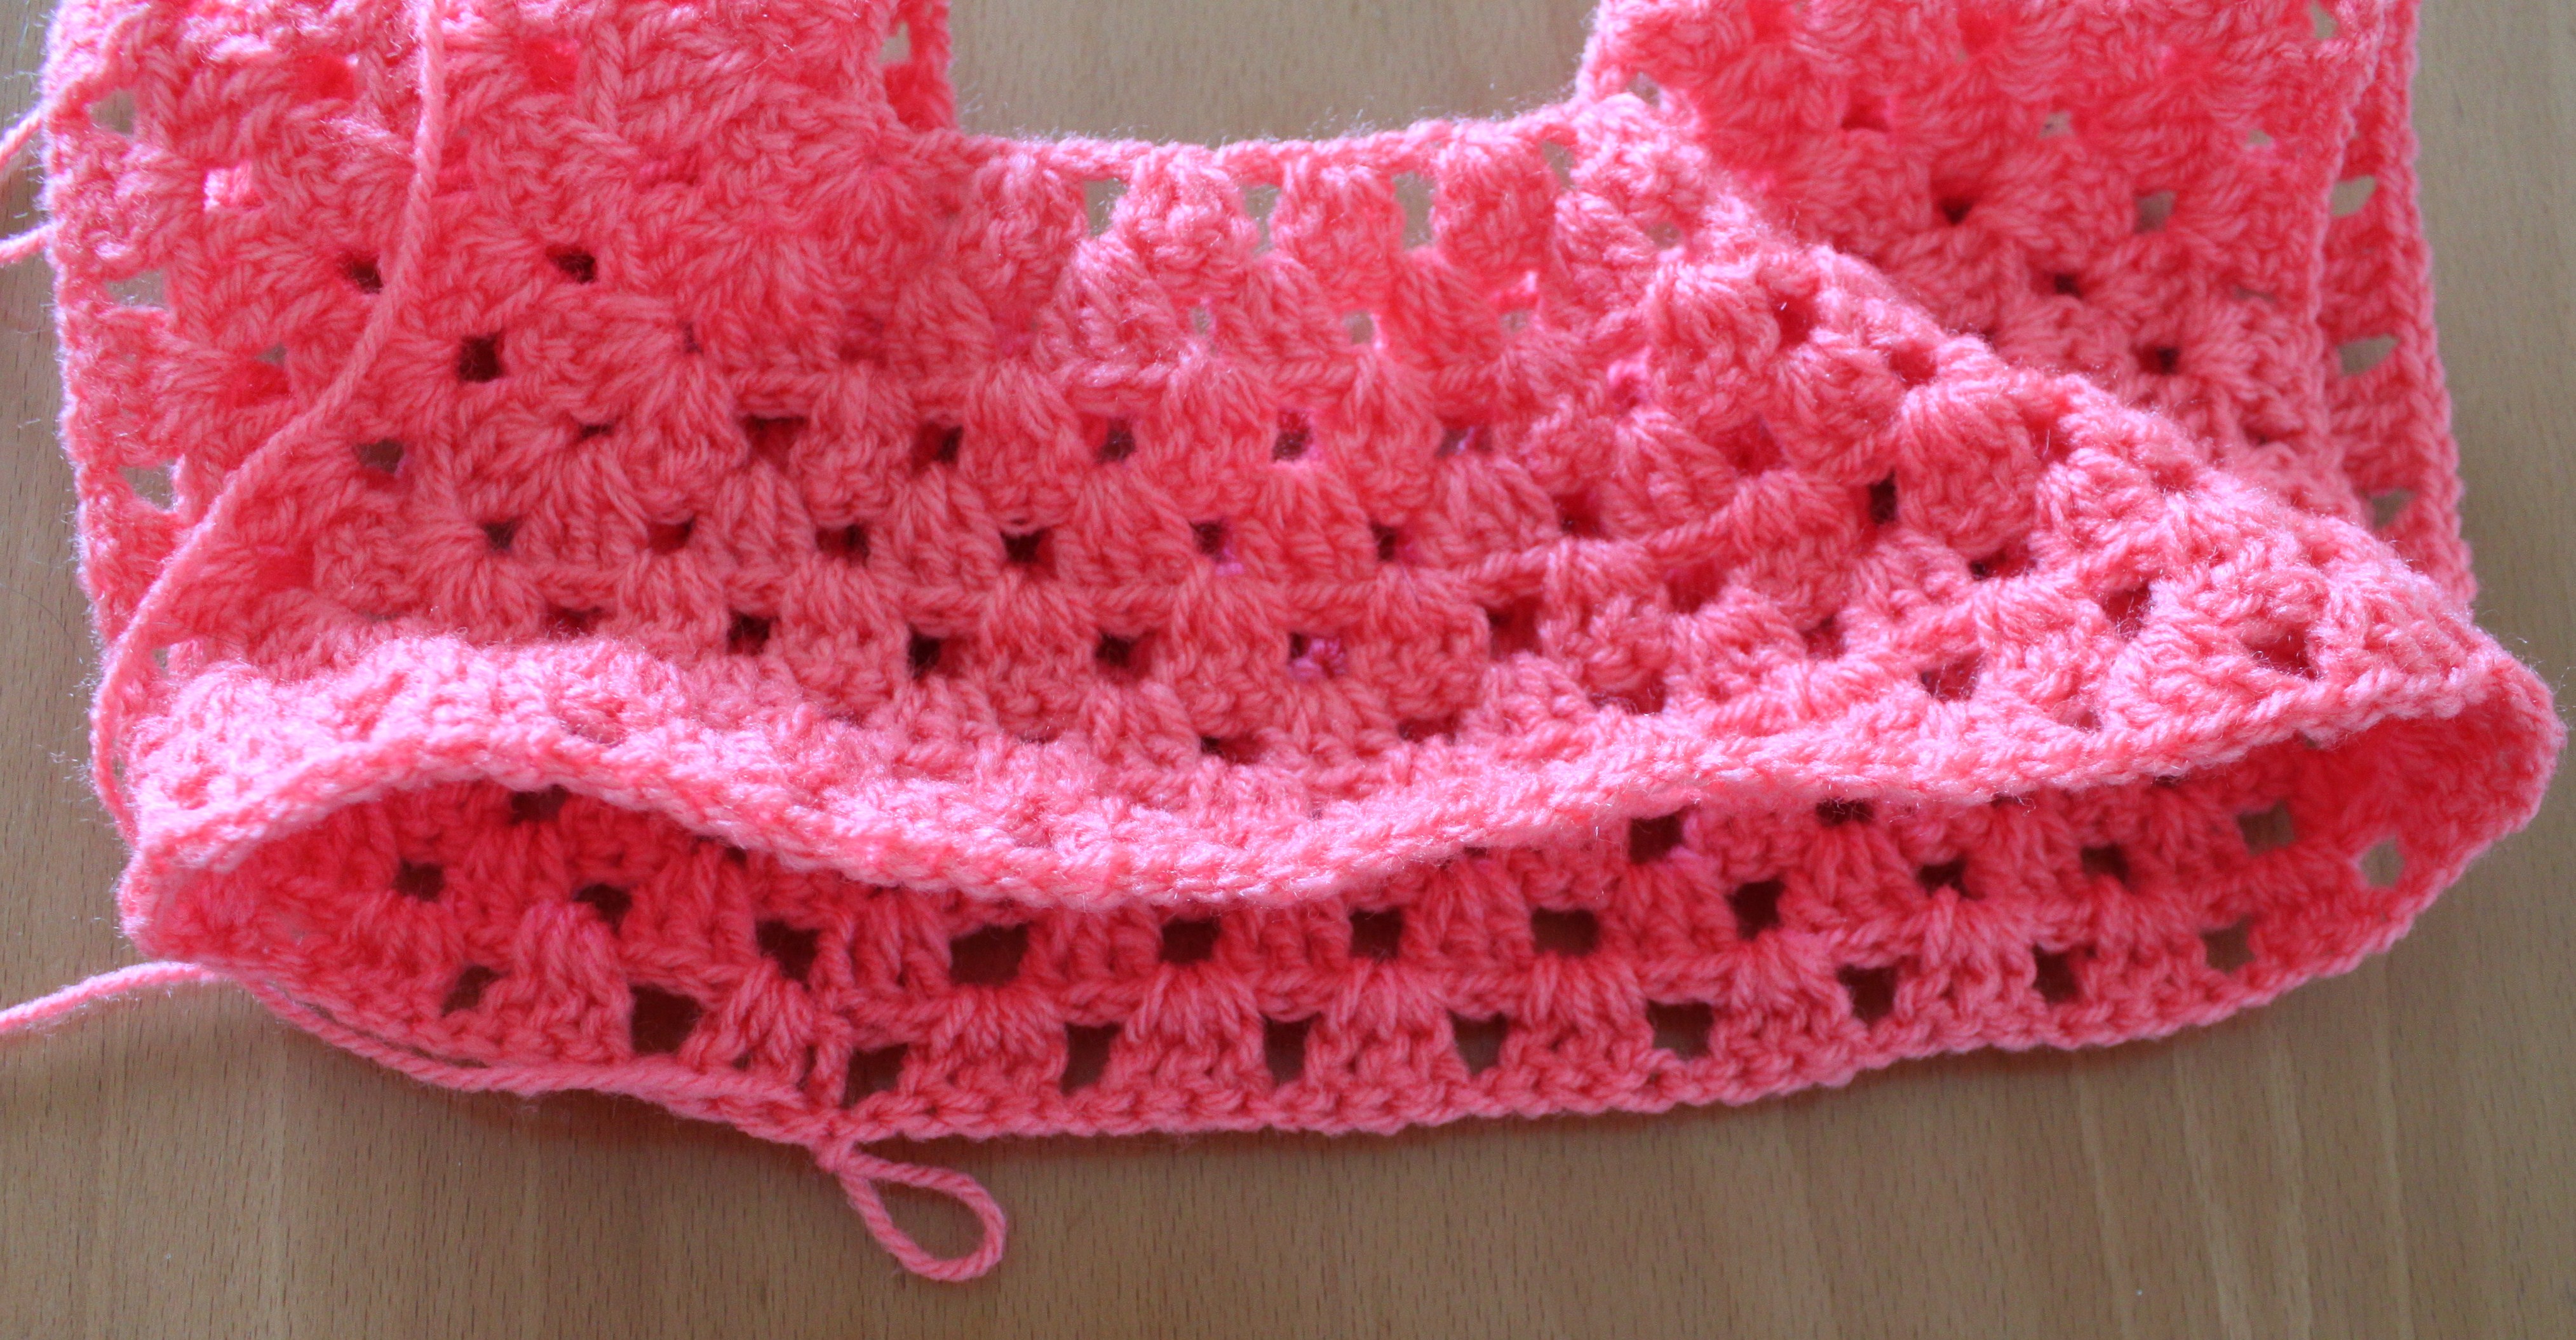
Now we should continue making the body part. make one more row and join the edges as shown in the picture below.
IMG_0014
make as many rows as required to reach the desired measurement. Here i have made 14 rows.
IMG_0016
If you want a sleaveless top then you can stop here by fastening off. Or you can join the sleeves by adding a new yarn. I have made 3 rows for sleeves.
IMG_0018
Hope the tutorial was helpful. If you have any doubts pls mention in the comment box below. Please like, comment and share .
Happy Crocheting


Friday, 19 June 2015

Granny Hexagon

10352757_1593934600863275_2972381743277310735_n
Hi friends here i come with a new tutorial today. As we all know granny square, granny rows, and granny triangle, we have 1 more pattern called granny hexagon. This is also a very simple pattern like other granny pattern, and you can use this motif in many projects like doily, table mat, coin purse handbag, bolero and many more. This is one of the best pattern for the beginners.
Abbreviations
Ch - chain
Dc- double crochet
Sl st  - slip stitch
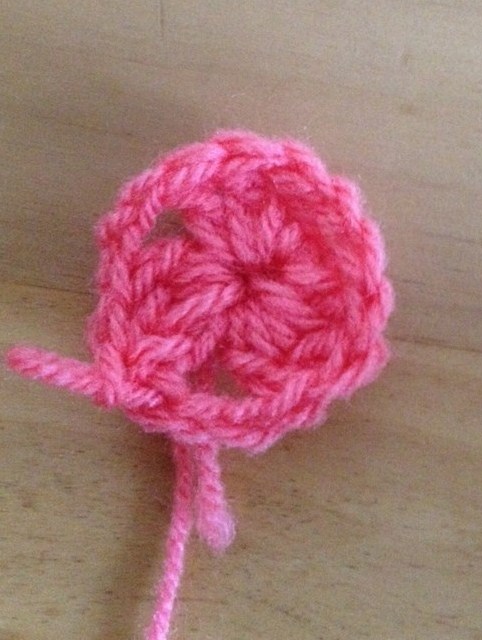
ch6 and sl st into the 1st ch to form a ring.
round 1: As we know it is a hexagon pattern we need to have 6 corners so ch3 2dc into the same loop, ch2 3dc, continue till we have 6 dc clusters , ch2 and join the round with a sl st into the 3rd ch of the beginning st.
11536720_1593934510863284_1262174405590116045_n
Round 2: ch3, 2dc, ch2 3dc into the same space and into every space (just skip ch3 instead make 1dc) till the end and join with a sl st.
10169359_1593934587529943_5846388812590320131_n
Round 3: ch3 2dc into the same space, ch2 , 3dc ch2 3dc into the corner space and continue till the end of the row and join with a slip st.
10352757_1593934600863275_2972381743277310735_n
If you want to make more rounds repeat round 3 till you reach the required measurement. or fasten off.
Hope the tutorial was helpful.Please share your views in the comment box. Like,comment and share if you like the tutorial.
Happy Crocheting

Thursday, 18 June 2015

Granny Triangle

11402698_1593148734275195_5235160733392830244_n
Hi everyone here i come with a new tutorial. It is a pattern of granny triangle. Very simple and easy to make and can be used in many projects like blanket, scarf, even u can just use these motifs as coasters too.
Abbreviations
Ch – chain
Dc- double crochet
Sl st  – slip stitch
ch5 and join with slip st into the 1st ch to form a ring 
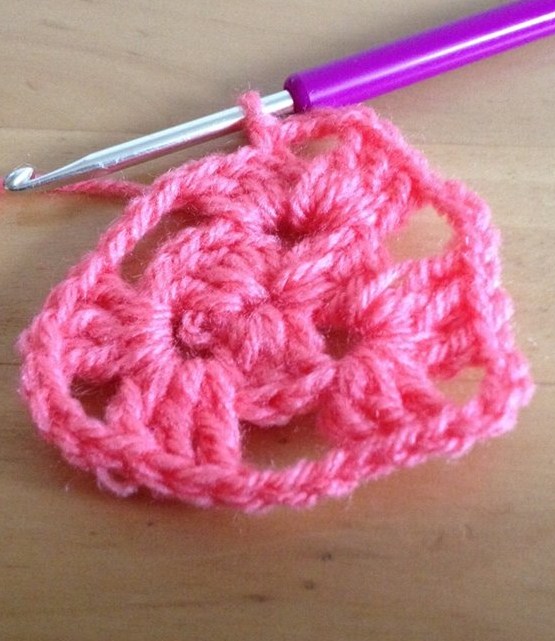
Round1 : ch3, 2 dc into the loop, ch3 and 3 dc into the loop , ch3, 3 dc ch3 and join the round with a slip st into the 3rd ch of the beginning st.
11140117_1593148664275202_1381503908735001148_n
Round 2 : ch3, 2dc ch2 3dc into the space, ch2 3dc ch2 3dc into next 2 ch3 spaces. ch3 and join the round with a sl st into the 3rd ch of the beginning st.
11401359_1593148677608534_7902766588761764468_n
Round 3: ch3 2dc ch2 3dc into the same space, ch2 3dc into the next sp and continue till the end of the round, and join with a sl st.
10614302_1593148704275198_5496079737226418373_n
round 4: repeat round 3
hope the tutorial was helpful.
Happy Crocheting.